Every year, I like to grow or buy a bunch of squashes and bake them up for using the rest of the year. I have a few favorite squashes I always get, and sometimes I add a couple new ones just to test them out. Last year my husband saw me baking up my all-time favorite – a Sweet Meat winter squash – and was horrified to learn that it is a winter squash and not a pumpkin at all that is used in my “pumpkin” pies! But here’s the story… pumpkin isn’t anywhere NEAR the most delicious squash to use in your kitchen. 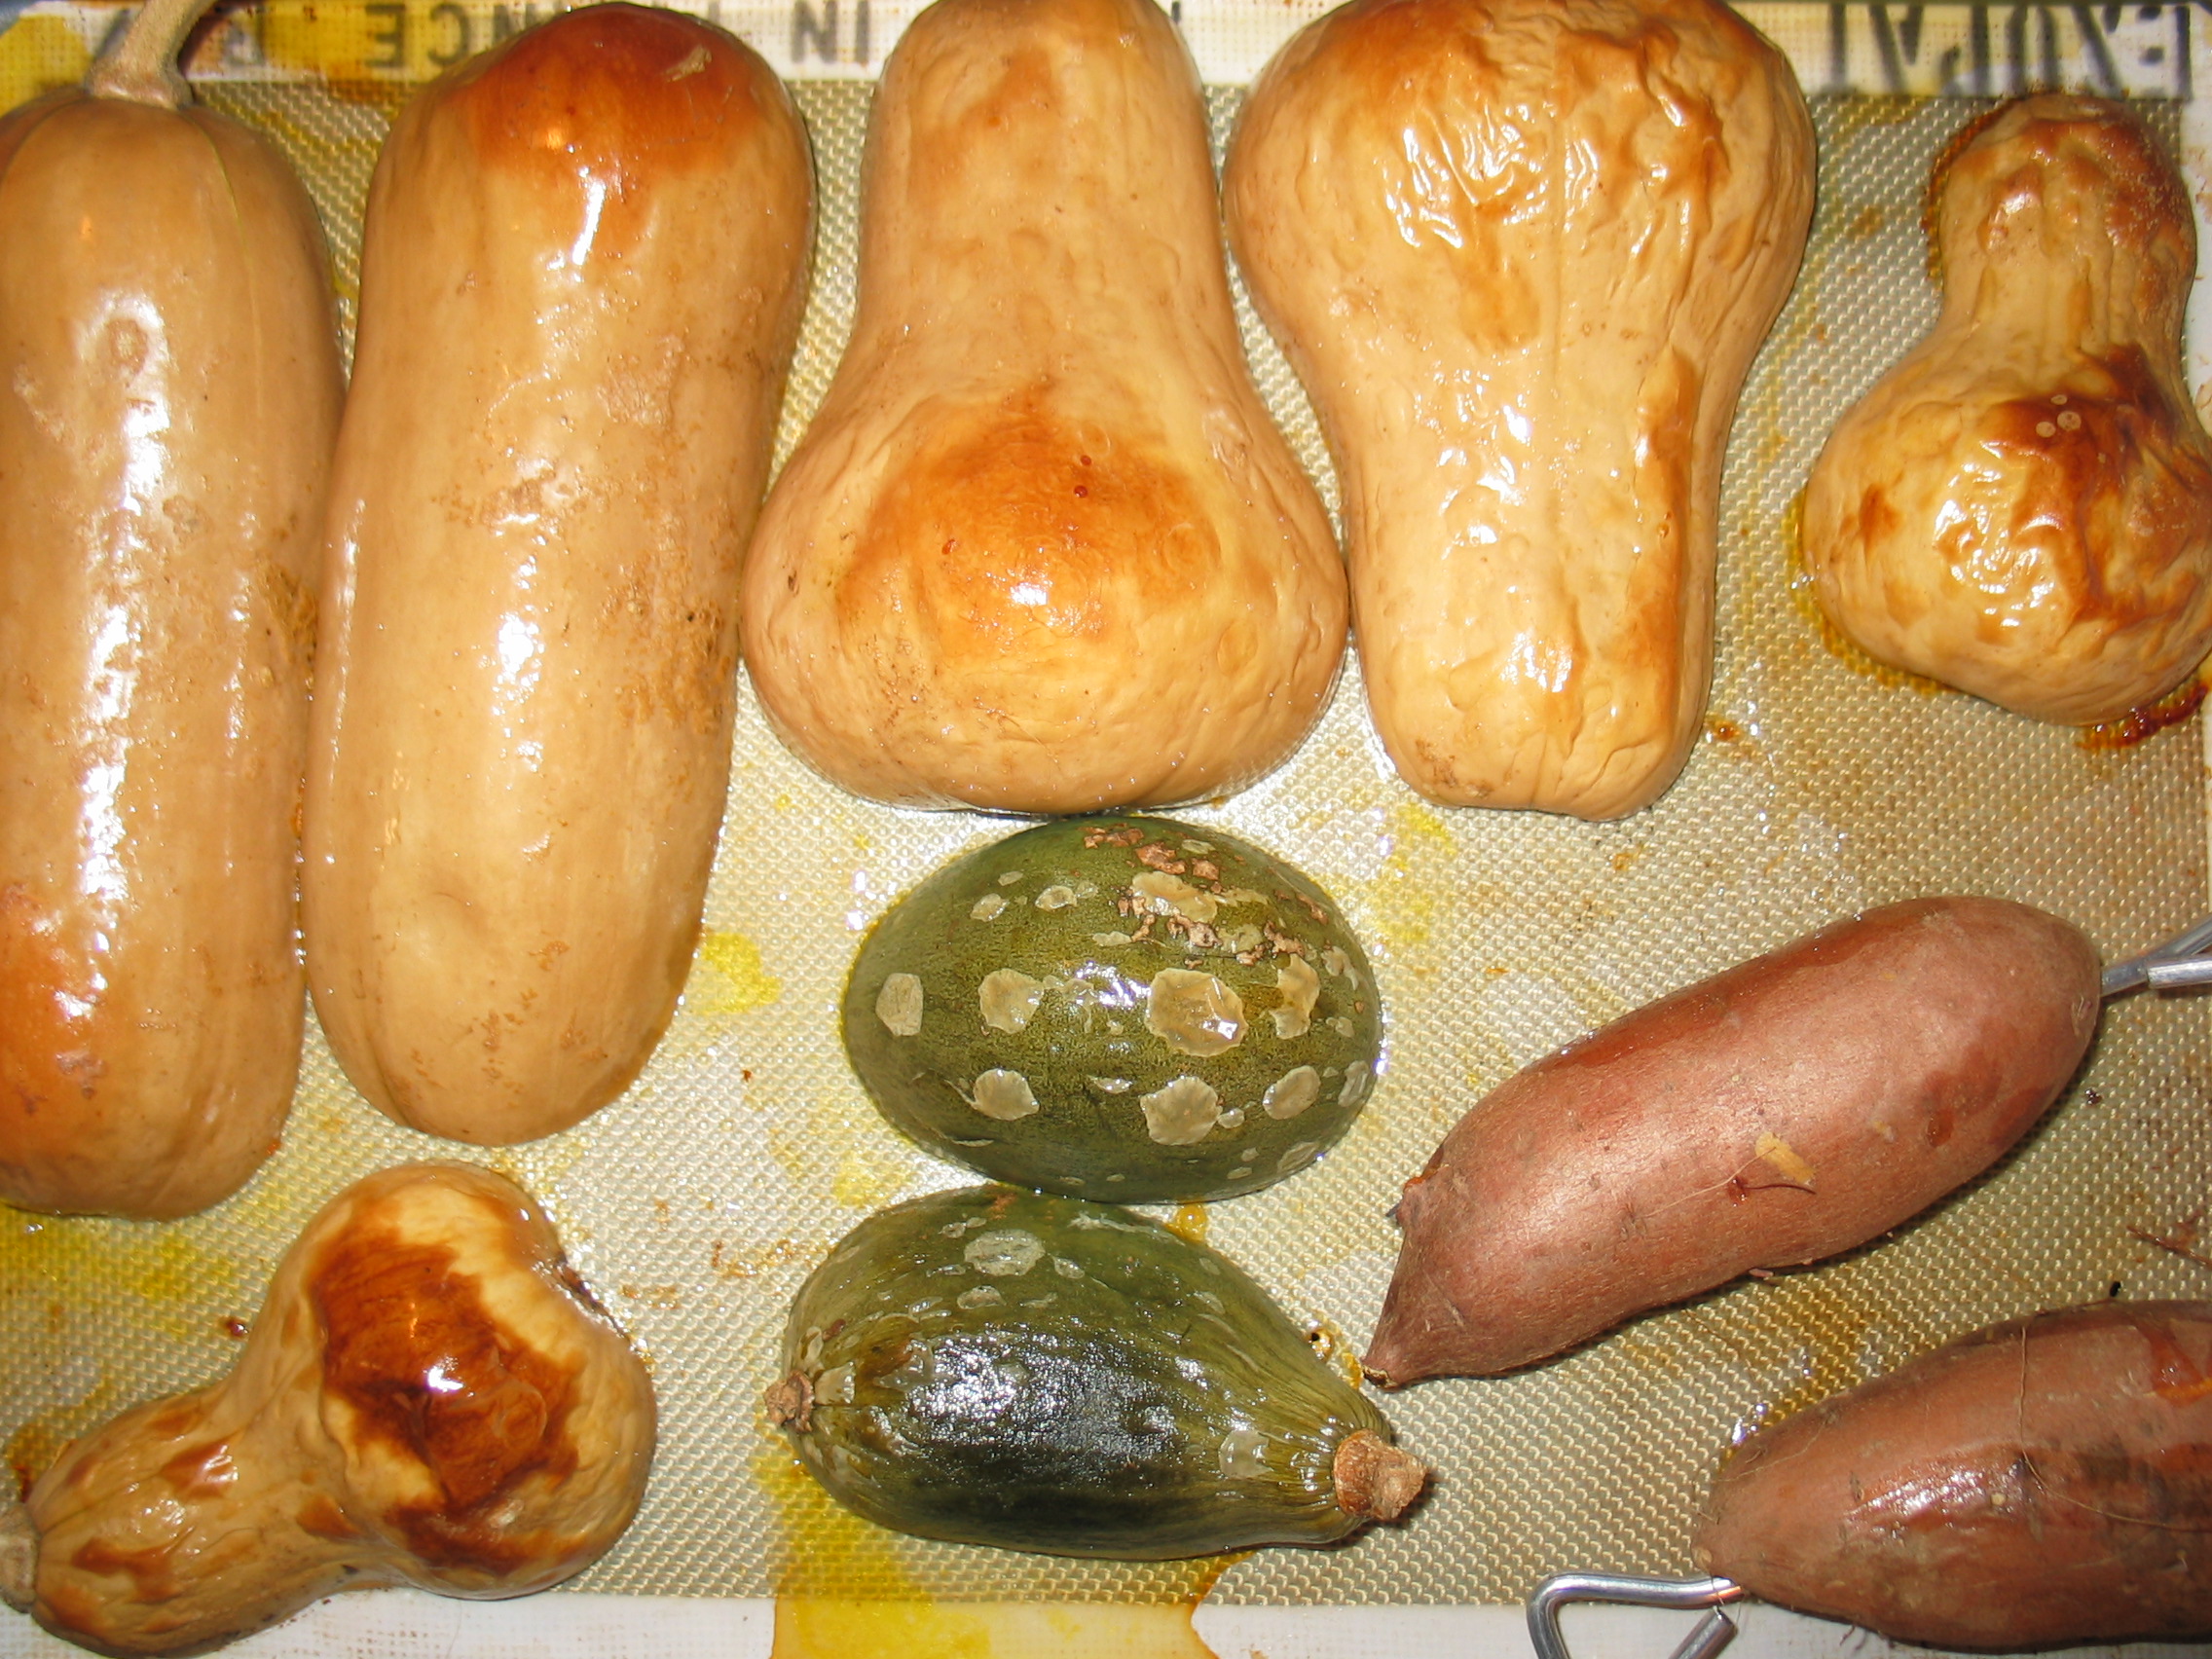
Winter squashes come in every shape and size – and color and flavor and sugar/water content. What you want in a good cooking squash is a thick walled, naturally sweet, DRY squash. Oregon natives Hubbard and Sweet Meat are amazing and hit the mark on all three targets. They also score highly on the optional criteria of “silky texture”. Any kind of turban or kubocha squash are wonderful processing squashes. Next on my list are the common butternut, delicata and acorn squashes you can typically find in the grocery store. The acorns are terrible to peel (but delicious), the delicata are easy to process (but not terribly sweet), and the butternuts are silky sweet (but super watery). In talking to one of my friends last night, I discovered that the act of processing one’s own squash is slightly controversial!
Now, I’ll admit that what you get in the cans at the store is well processed, sweet, and flavorful squash meat. It’s fine. It’s pure pumpkin. Use it if you don’t want to bother with this process. But that’s city thinking! If you want to bring the farm to your lifestyle, you would be growing these beauties – or at the least, getting them at the farmer’s market. You’d be using them as decoration for the fall season on your porch or dining room table, then baking them up in a batch for use later on in the season. You might even find a way to bake up your left-over jack-o-lanterns the day after Halloween so as not to waste them. This is how things go around my house. 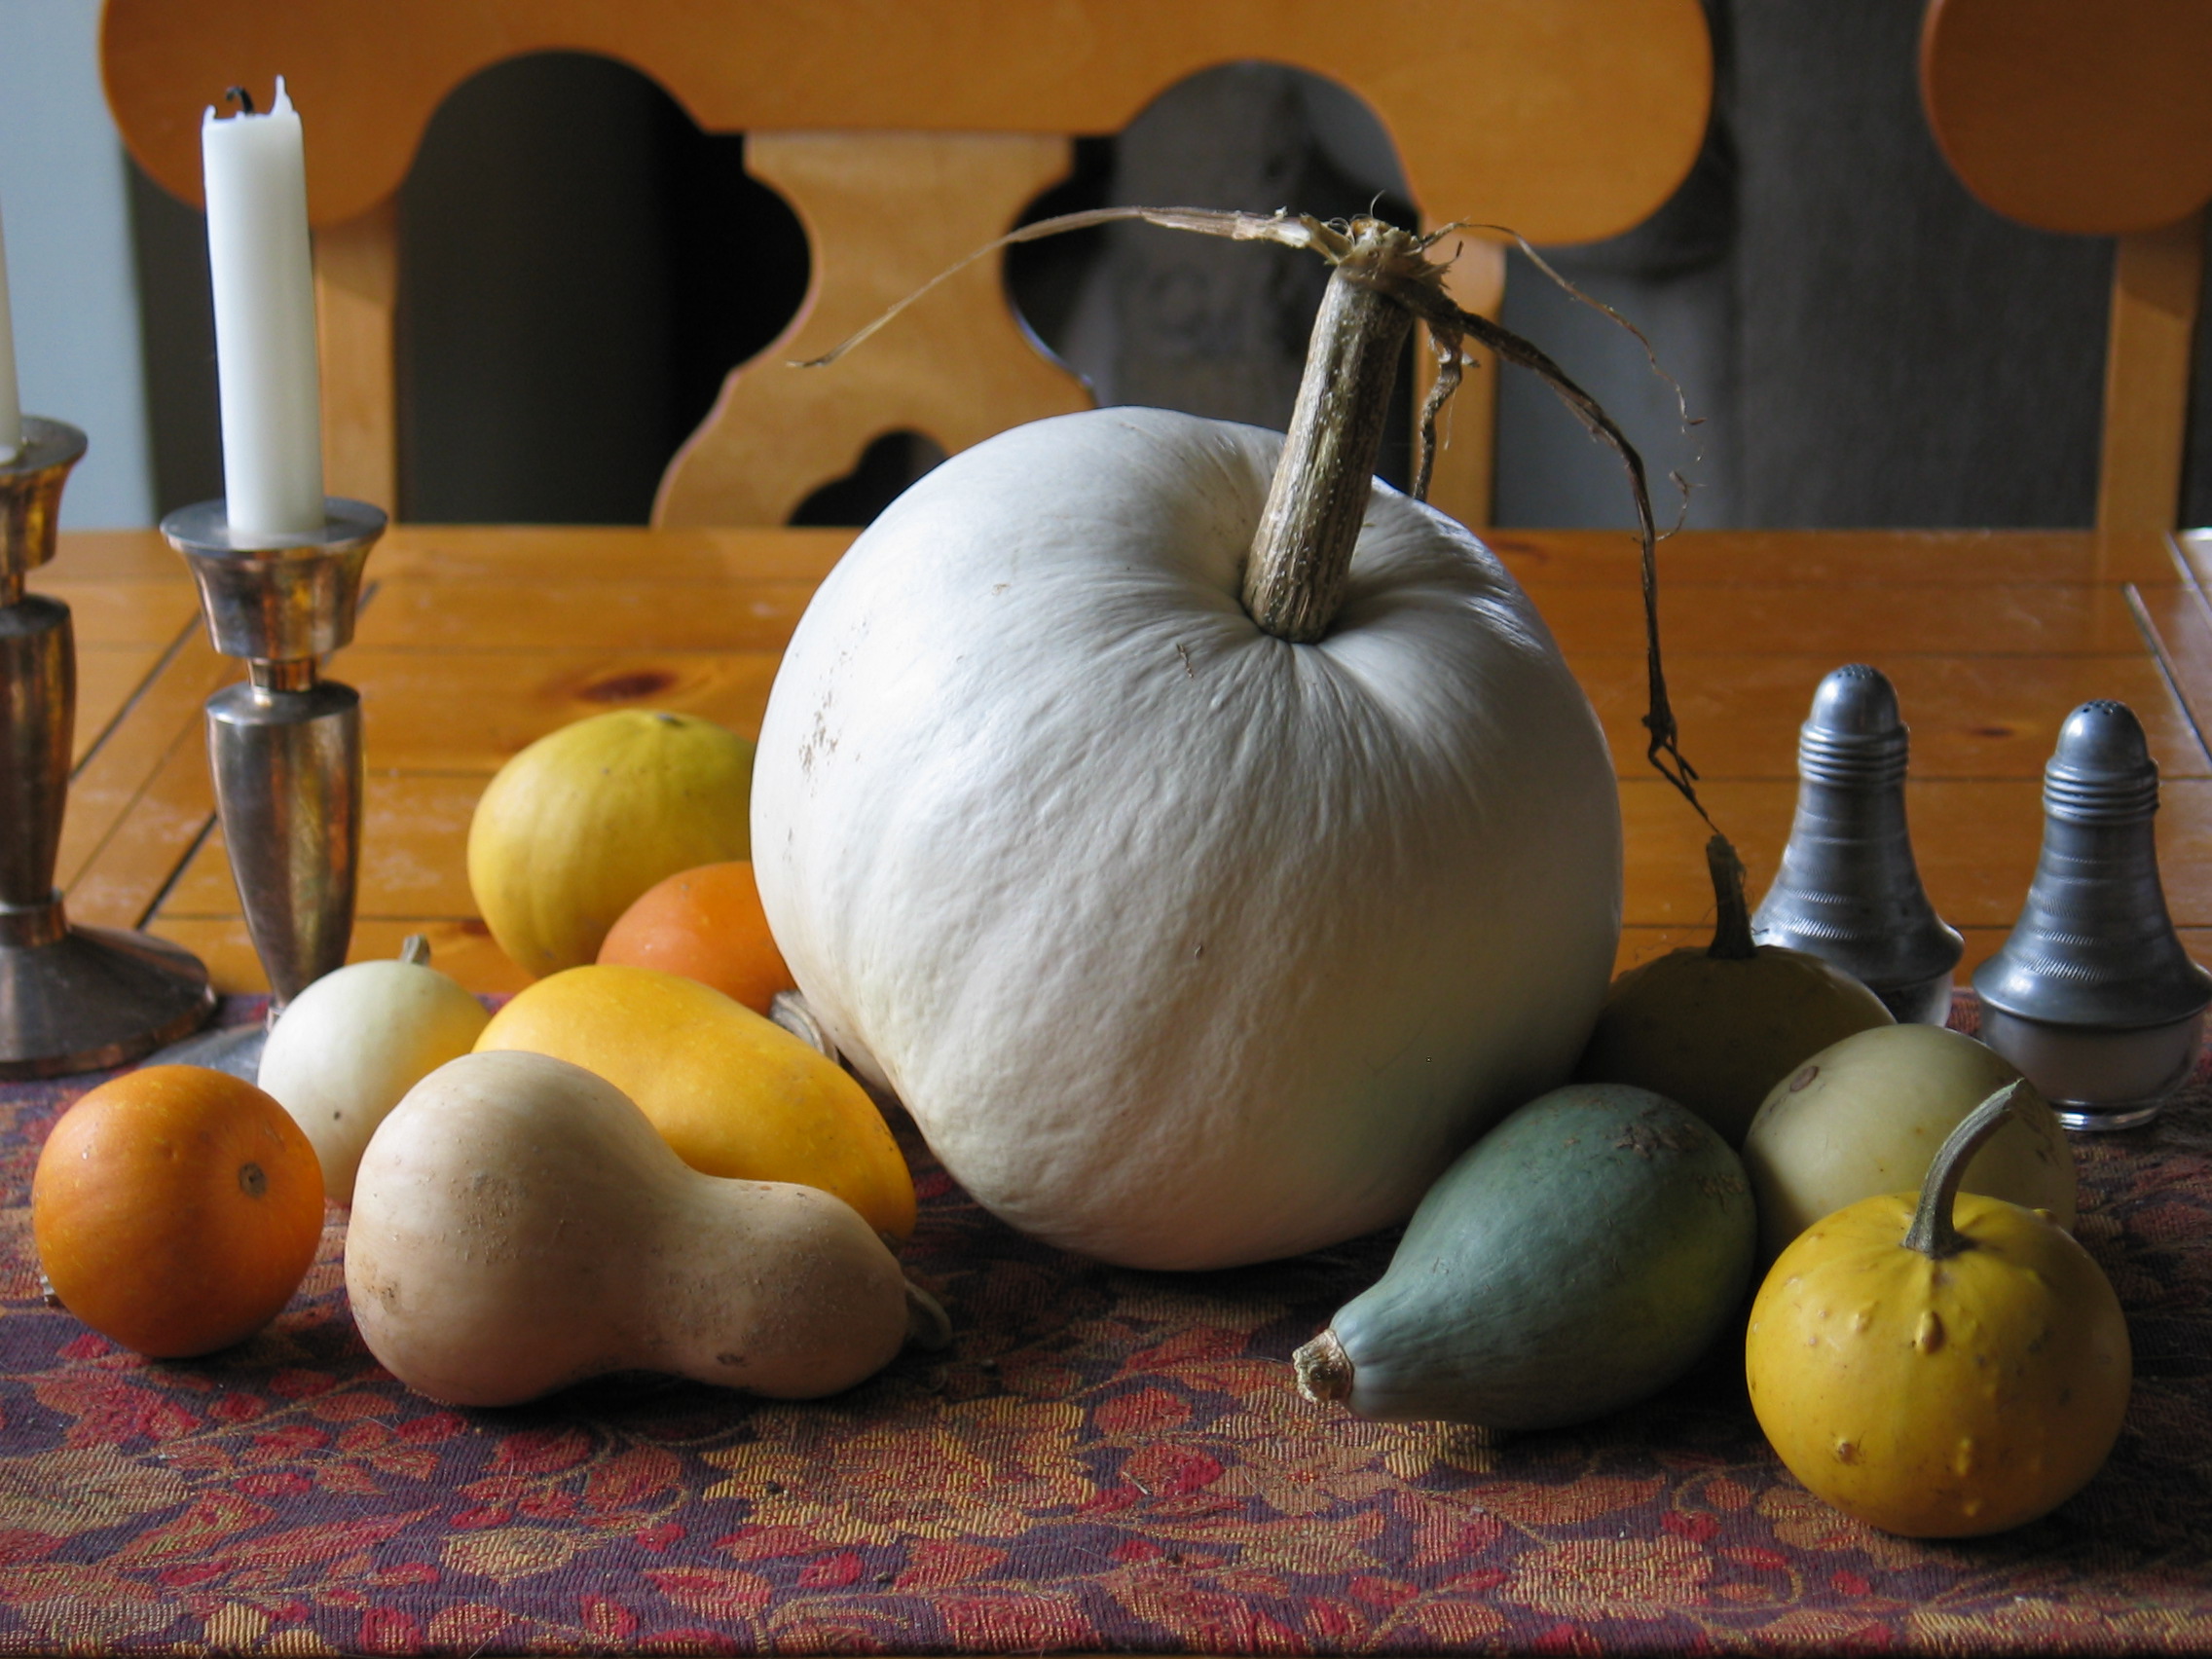
So if you want to try something new, buy up half a dozen of the biggest, weirdest squashes you can find and bake them up. Here’s how I do it:
Make sure the muffins you hid from your toddler aren’t in the oven before you begin this process. This is very important, unless you need to shrink-wrap your muffins.
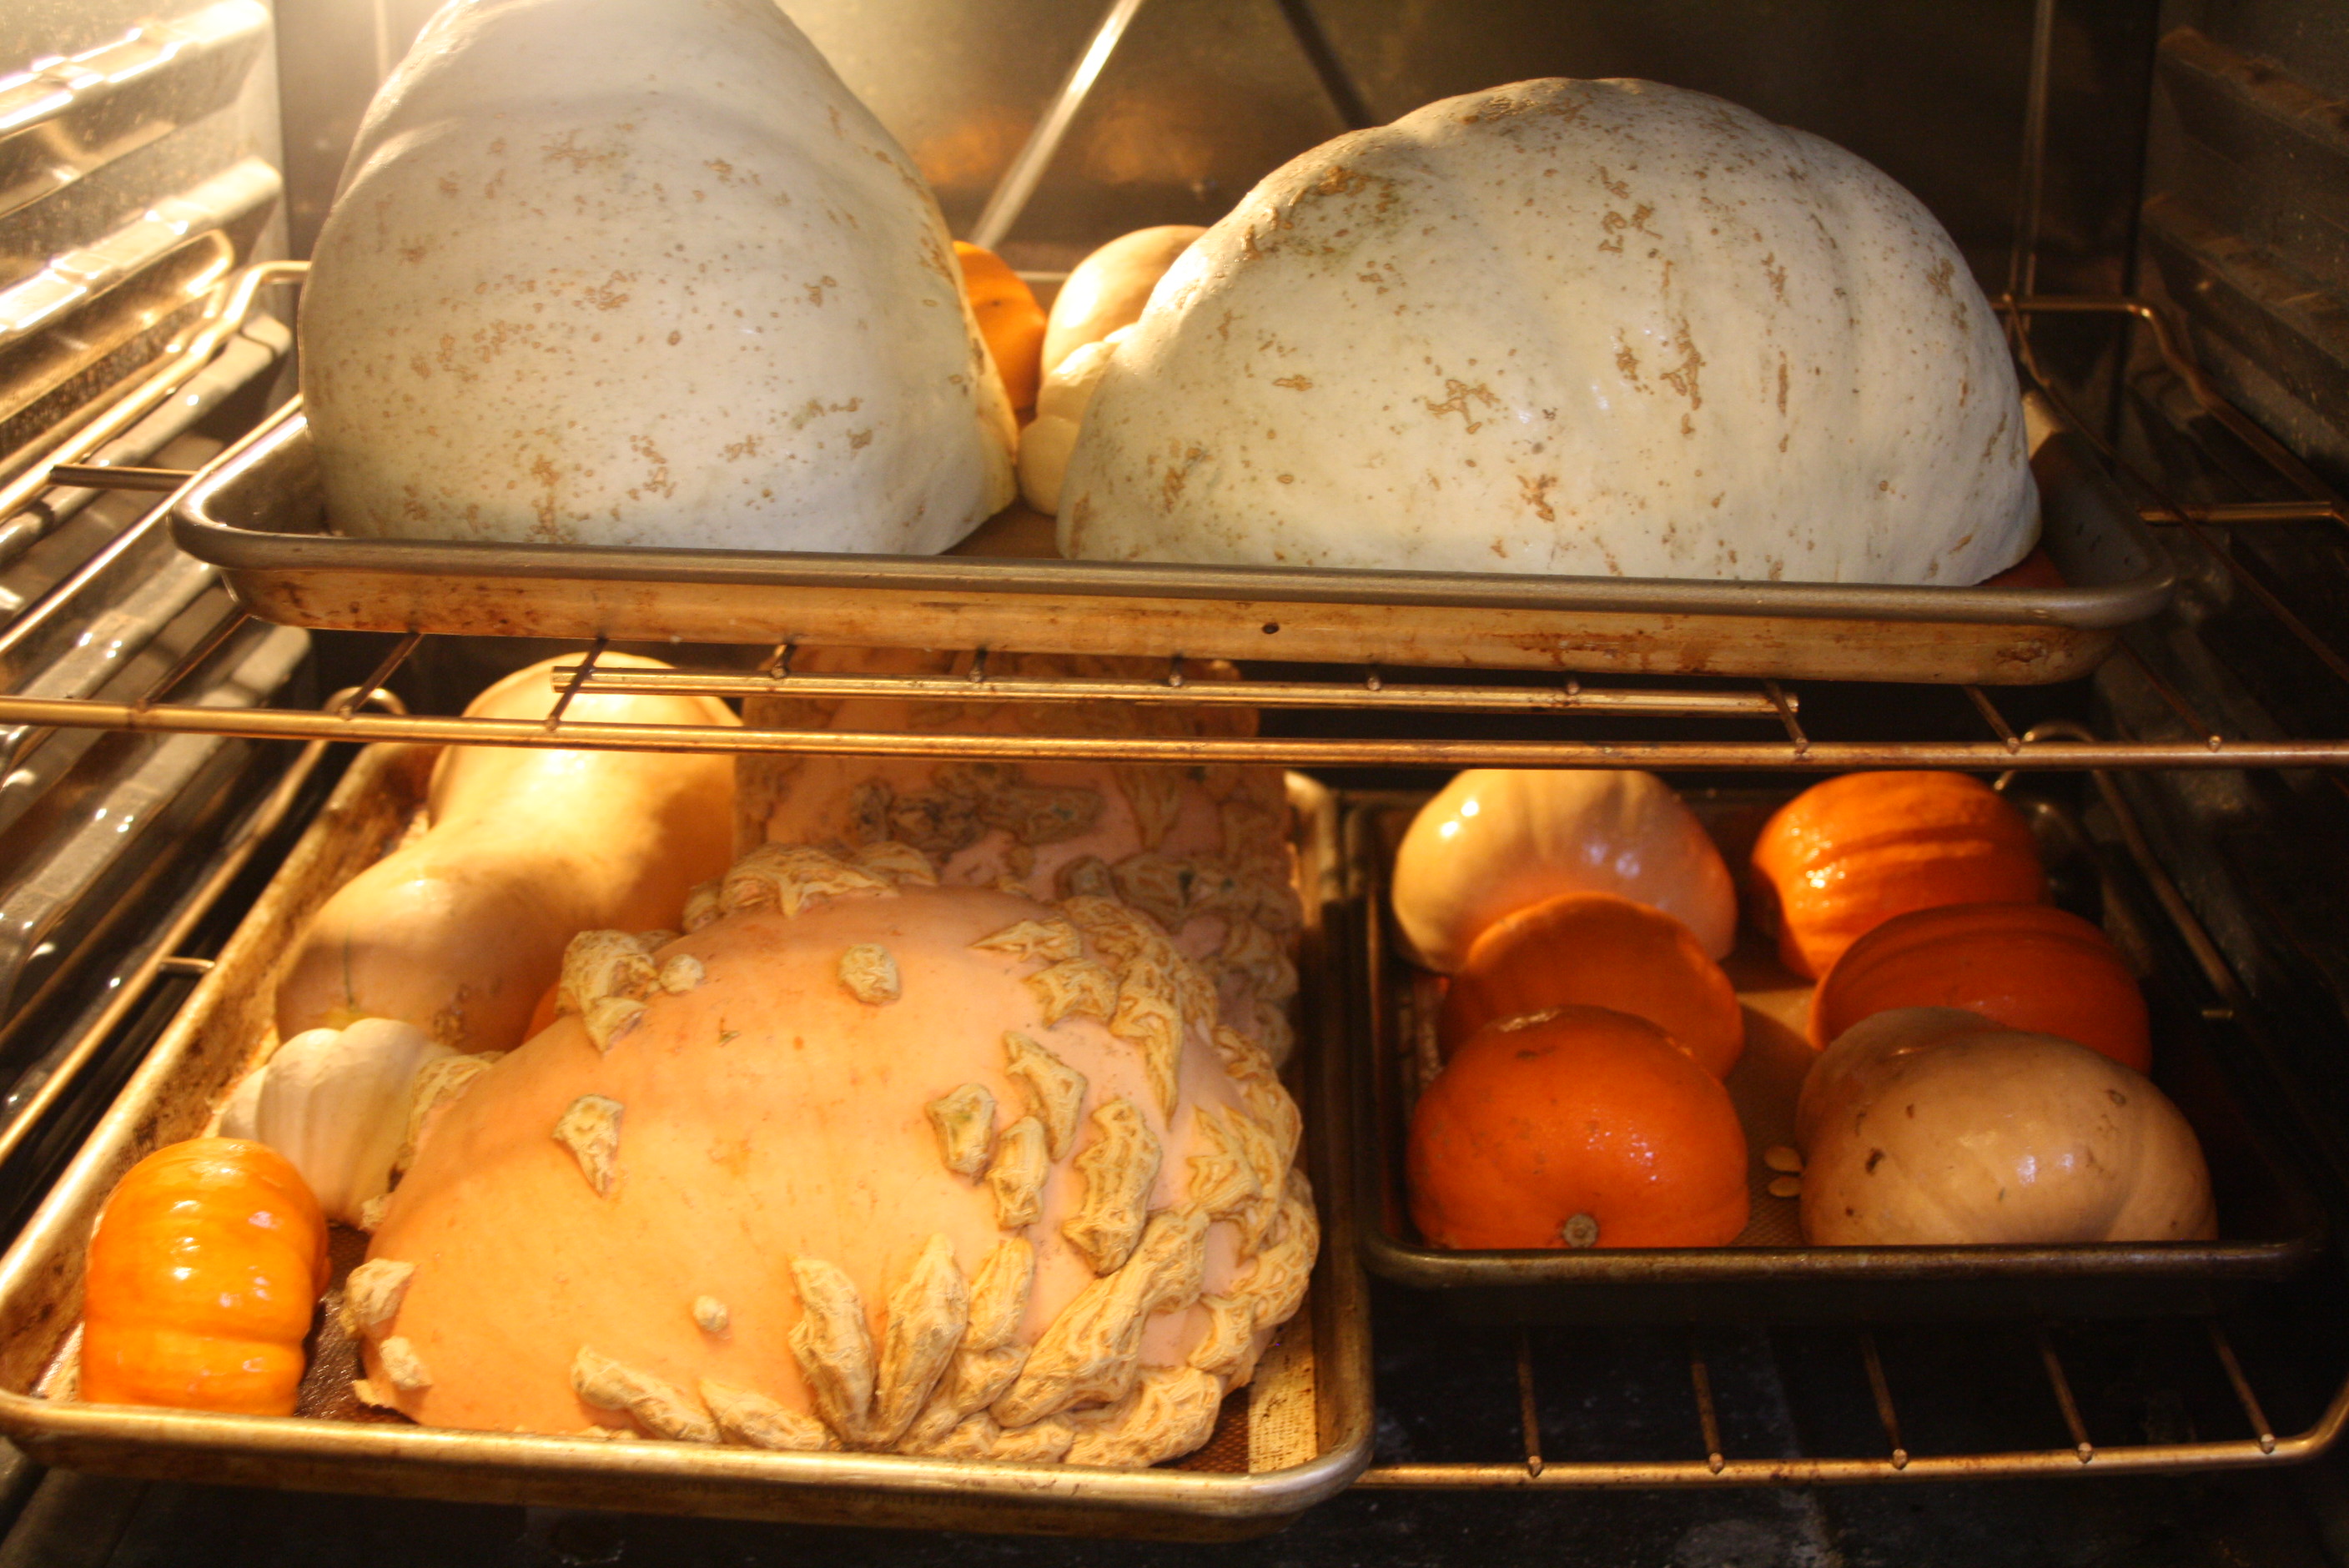
Preheat oven to 350 degrees. Using a large, sharp knife, CAREFULLY cut your squashes in half. Place them cut side down on a silpat or lightly greased parchment paper on a heavy-duty, rimmed baking dish. I used aluminum cookie sheets. The squashes will leach out a lot of liquid so make sure you have them in something that will be able to collect that liquid. Otherwise it will dump into your oven – this is bad.
Bottom-left: Acorn, Galeux D’Eysines; Bottom-right: Sugar Pie, Acorn
(I cooked up the Jack-Be-Little minis, but we don’t eat them. Henry insisted they be included 😉
Arrange as many as you can on the sheets and pop them in the oven. Don’t worry about the seeds, stems, or un-even cutting. The squashes will steam in there and everything will be easier to deal with once they are cooked. Bake for about 45 minutes to an hour. Once you start to smell them, peek in there and poke them with your finger. If they are soft enough to leave an imprint, or have sort of collapsed under their own weight, they are done! 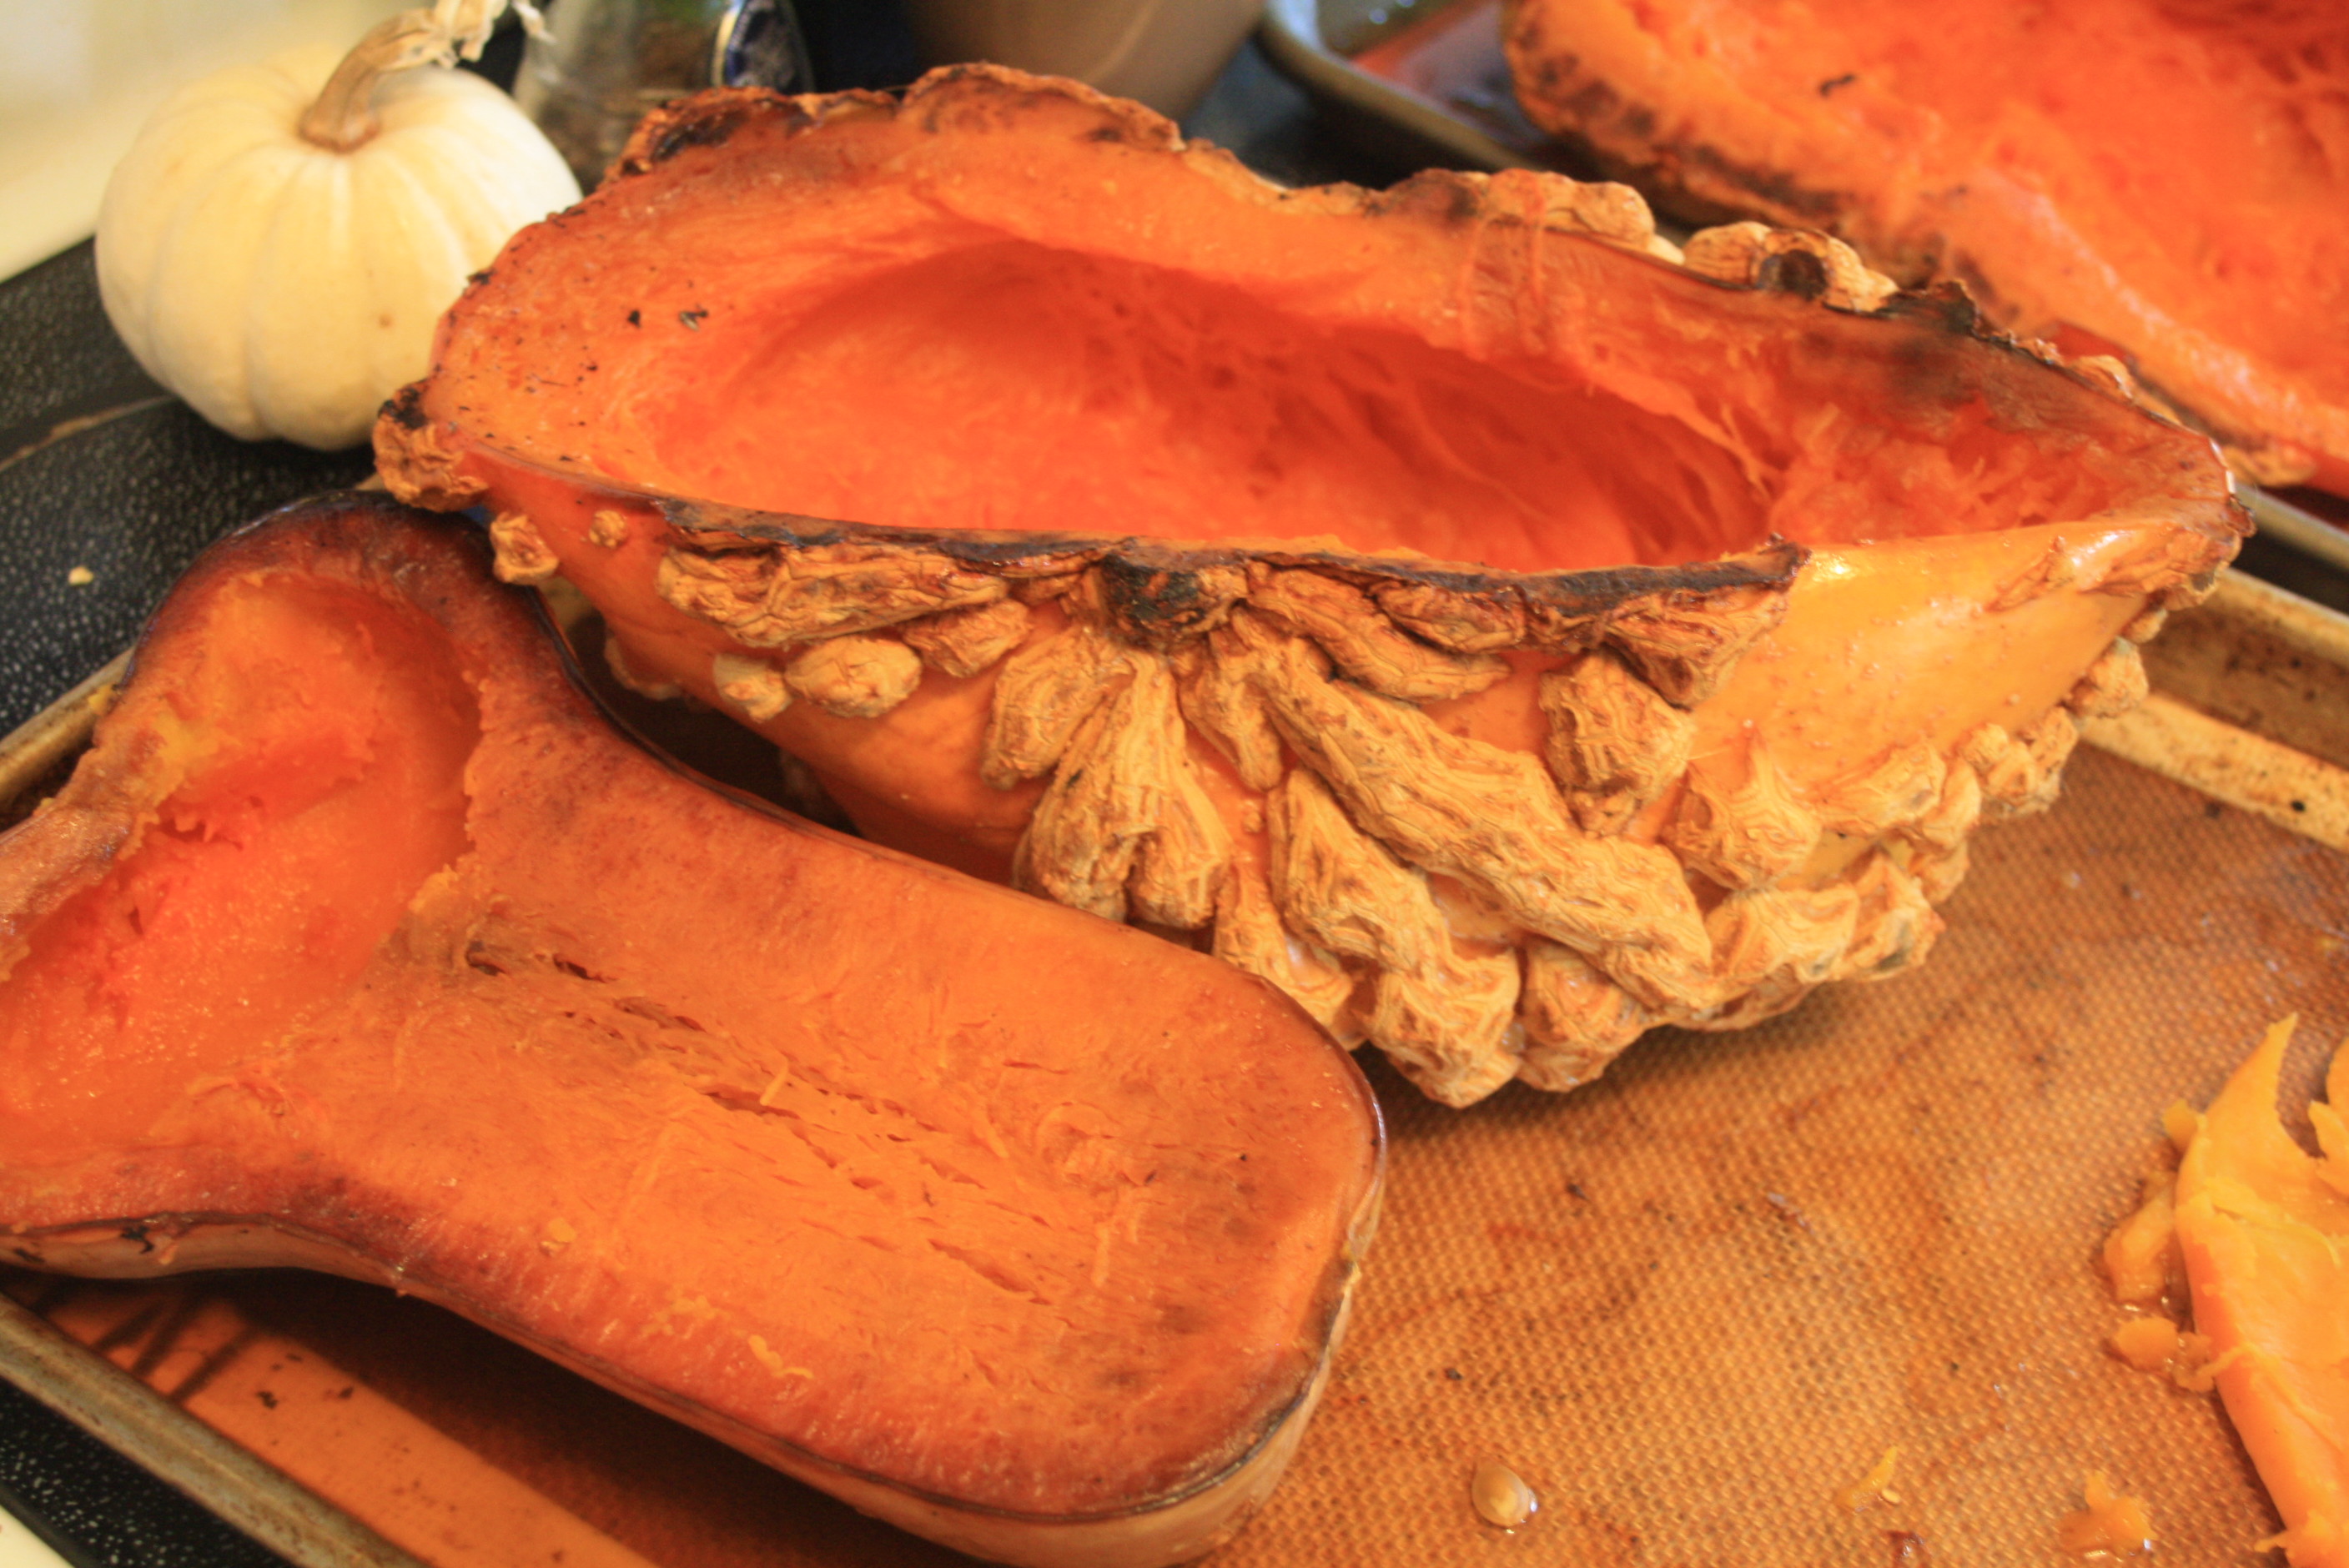 Let them cool for about 30 minutes, then carefully flip them over. They will probably retain a little pocket of steam in their seedy middles, so use a flipper to help. Scoop out the seeds and any stringy pulp from the middle. If you have chickens, give all the guts to them – they are a terrific natural de-wormer! ALWAYS taste the squash at this point and make sure it is palatable. The beautiful, warty Galeux D’Eysines squash that was so perfect on my table and that the grower assured me would be sweet and delicious was TERRIBLE and I had to give it to the birds. Don’t process anything that doesn’t taste good at this stage.
 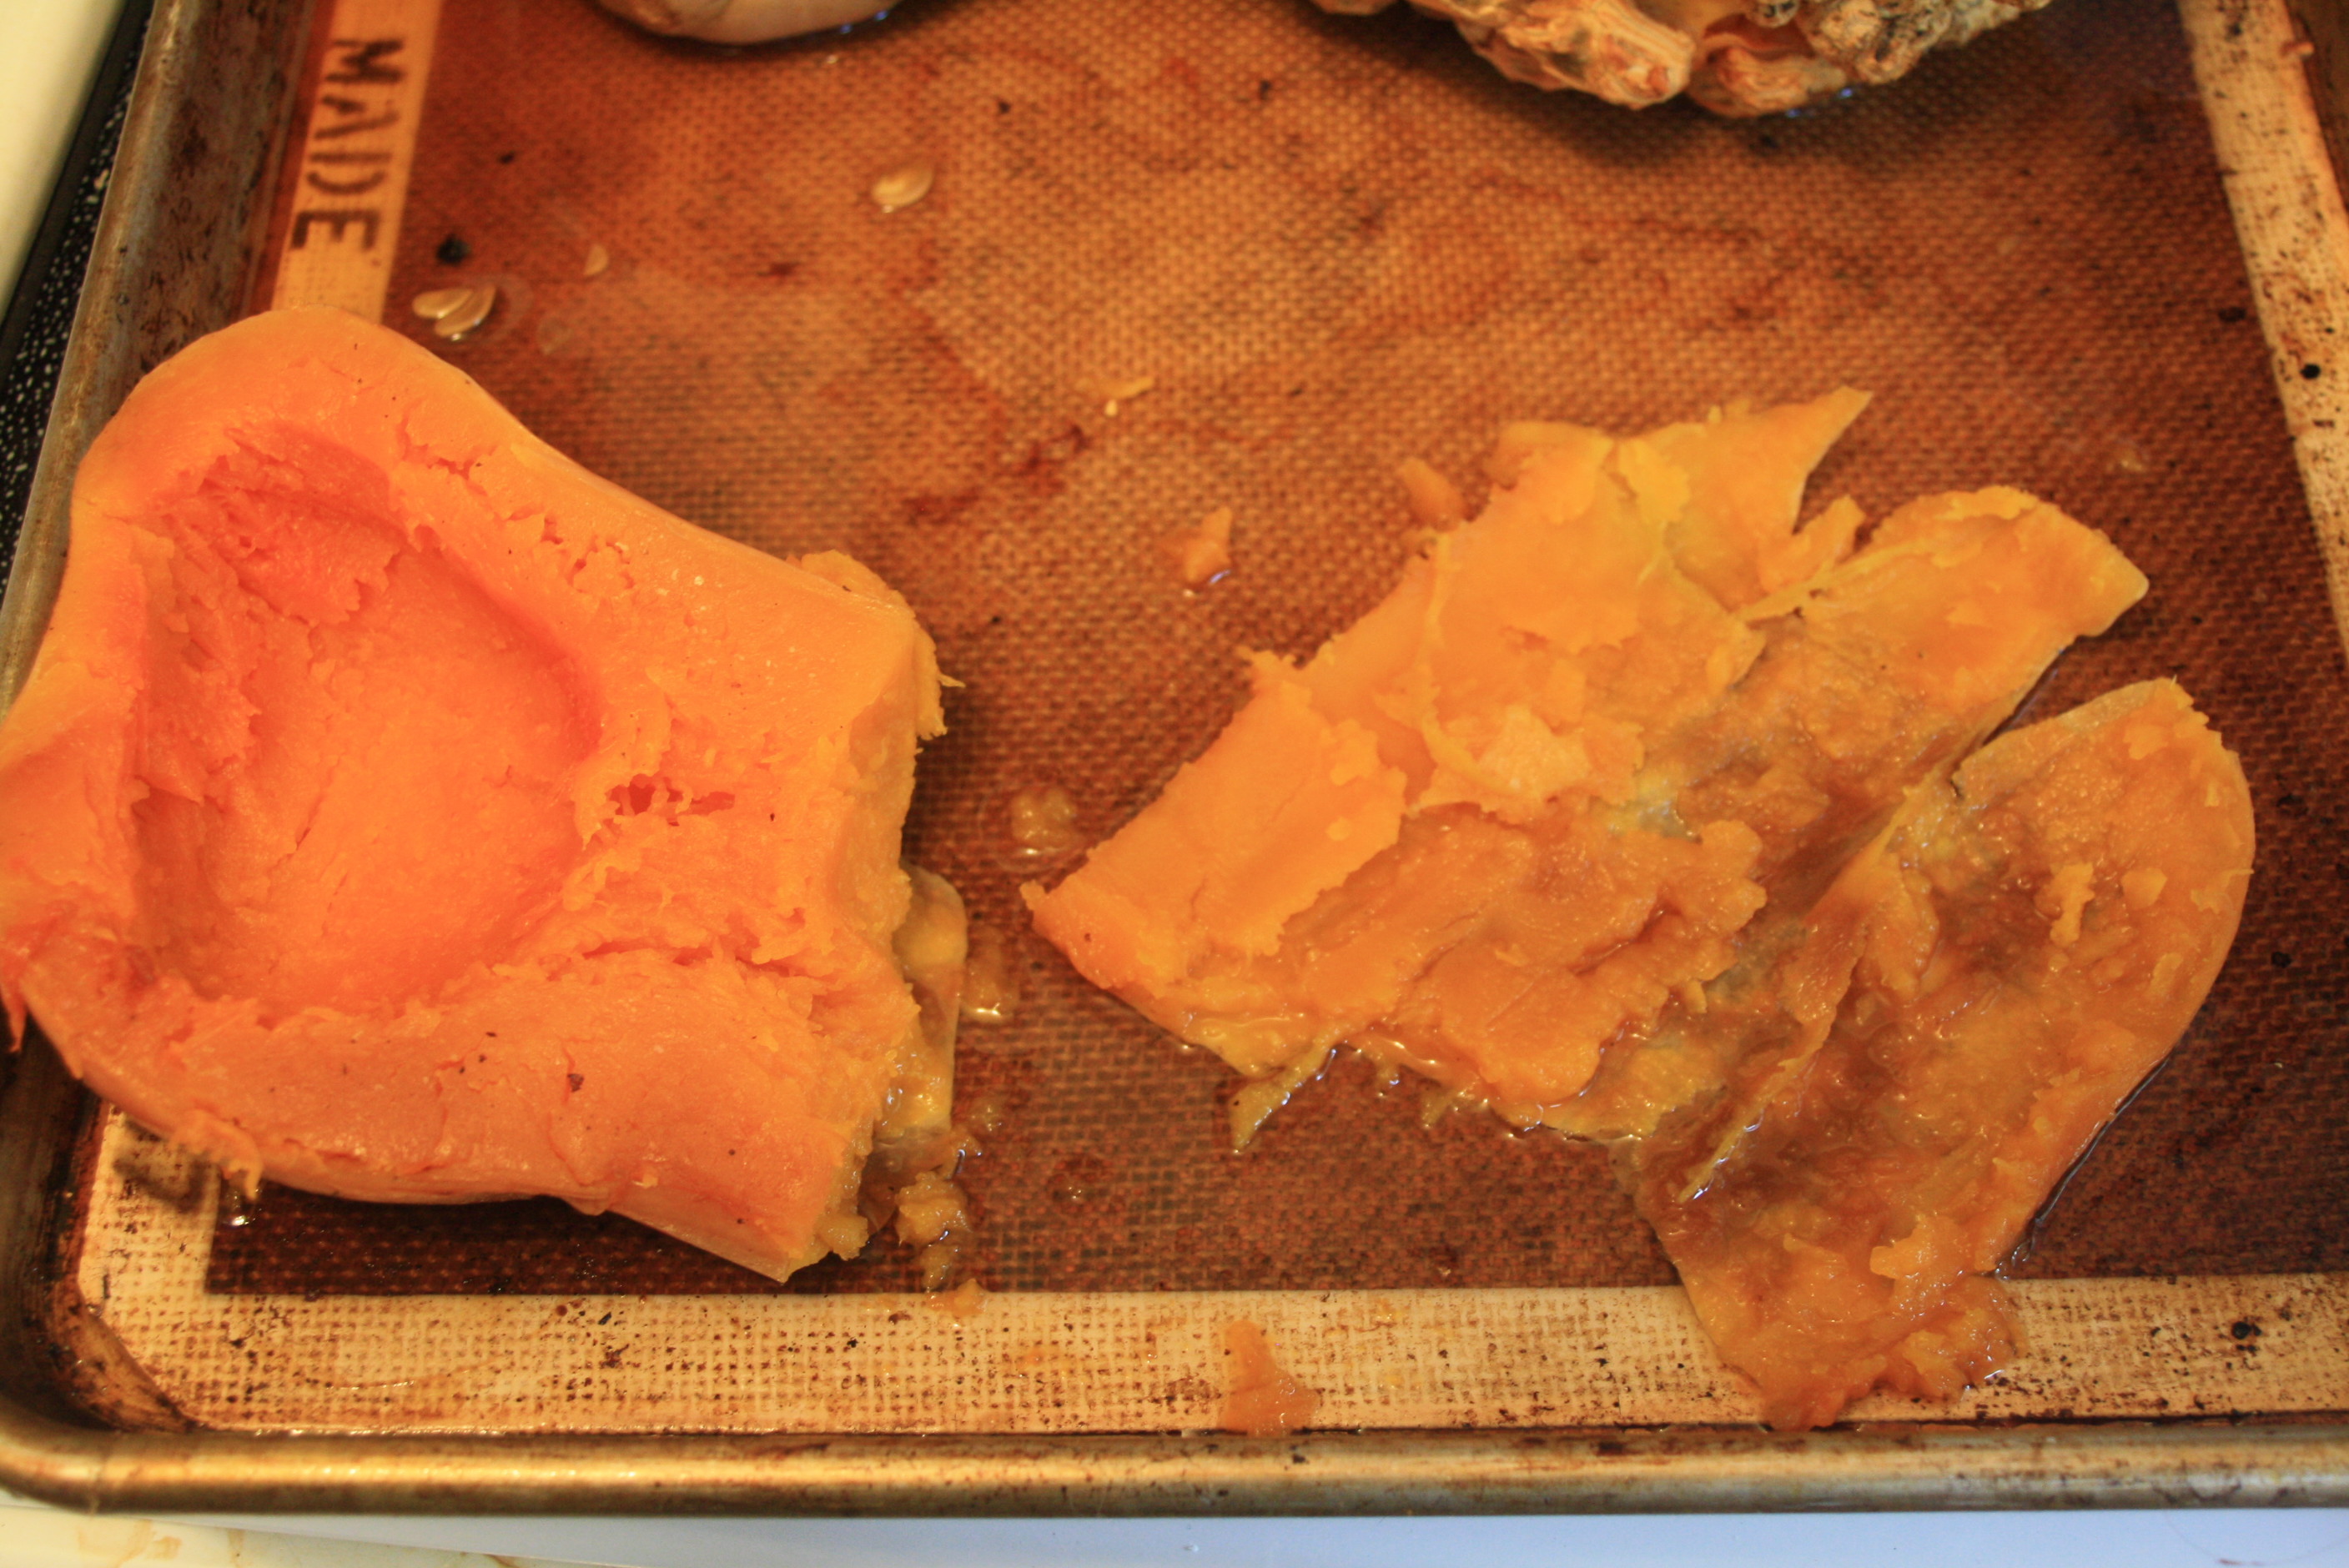 Scoop the tender squashy middle away from the skins and put it in a bowl. Now, most of the squashes you’ll find need 1-2 more steps before they are ready for canning or freezing. Milling and draining. They sound harder than they are and I supposed you could skip them, but I don’t recommend it. Here’s what to do:
 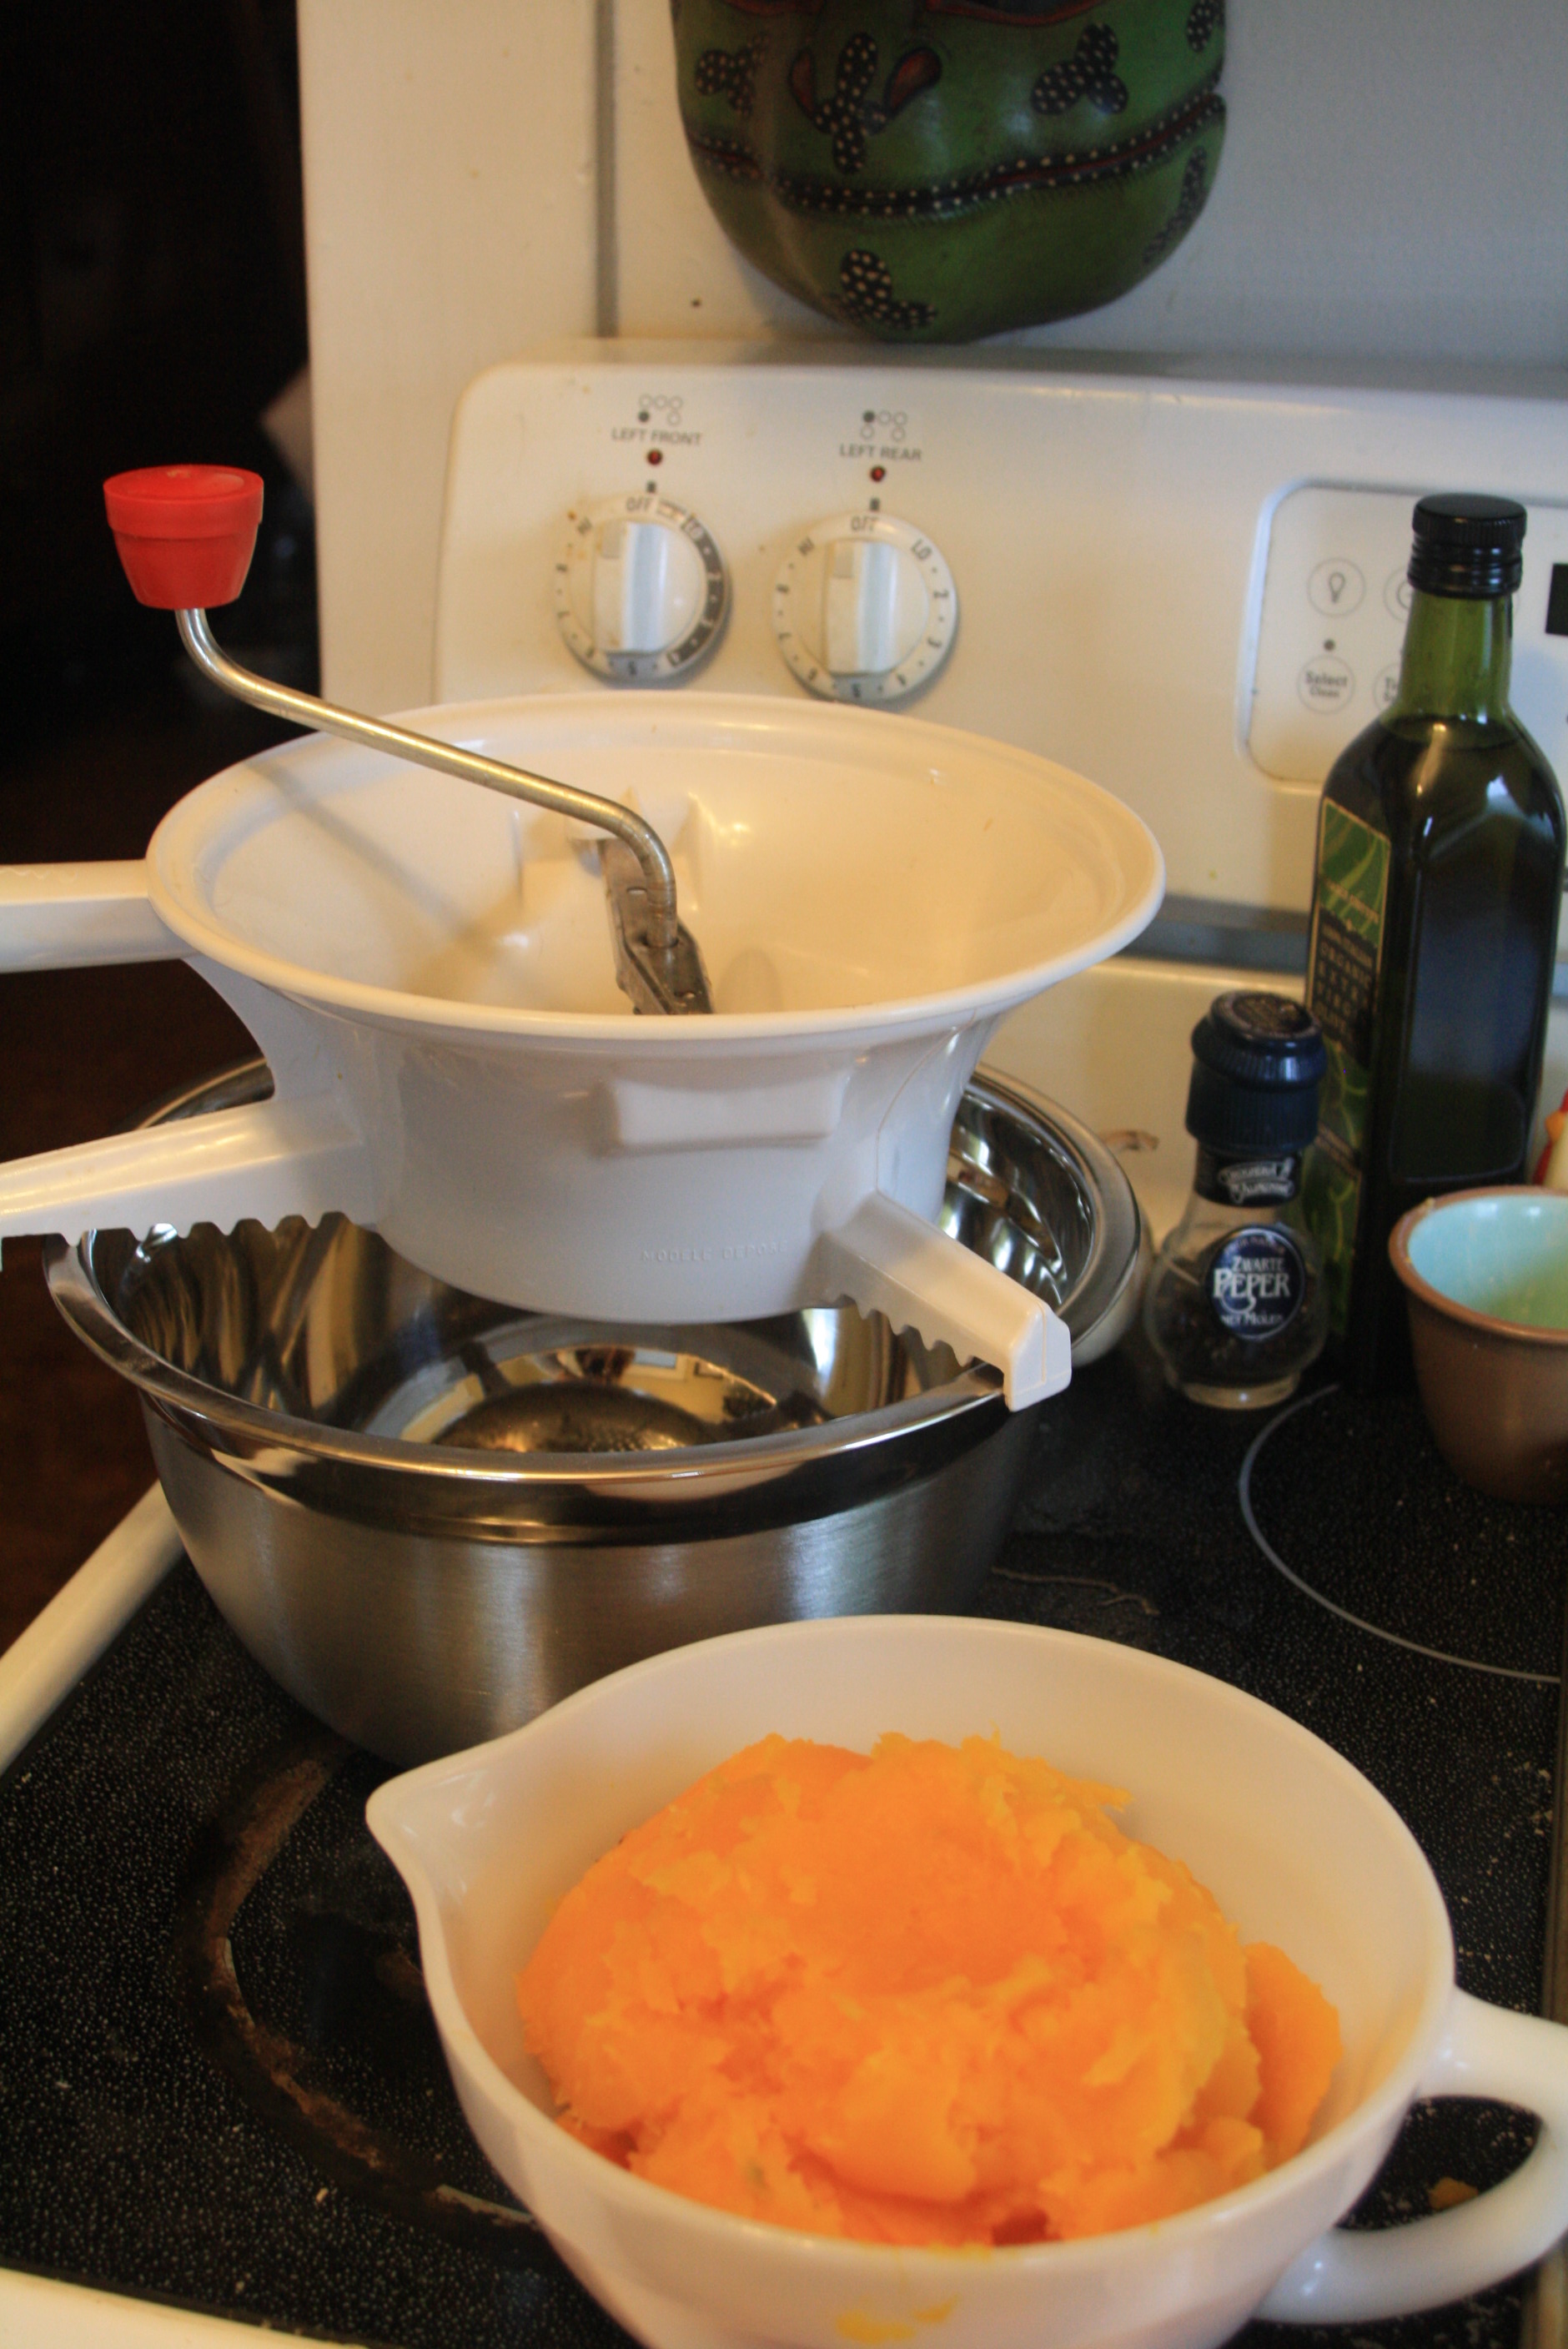 Get a food mill and pass the pumpkin flesh through it on the finest blade you have. If you don’t have this item, put it in a food processor. A blender might work, but only if your squashes are wet. Once the texture is as smooth as baby food, put it all in a medium sized bowl lived with a thin-ish, cotton dishtowel (or 2-3 layers of cheesecloth – I use towels because it is less wasteful and the pumpkin is less likely to squish through). Pull up the opposite corners and tie them into double knots. It’s sometimes easier to place a utensil under your knots to get them as even as possible.
 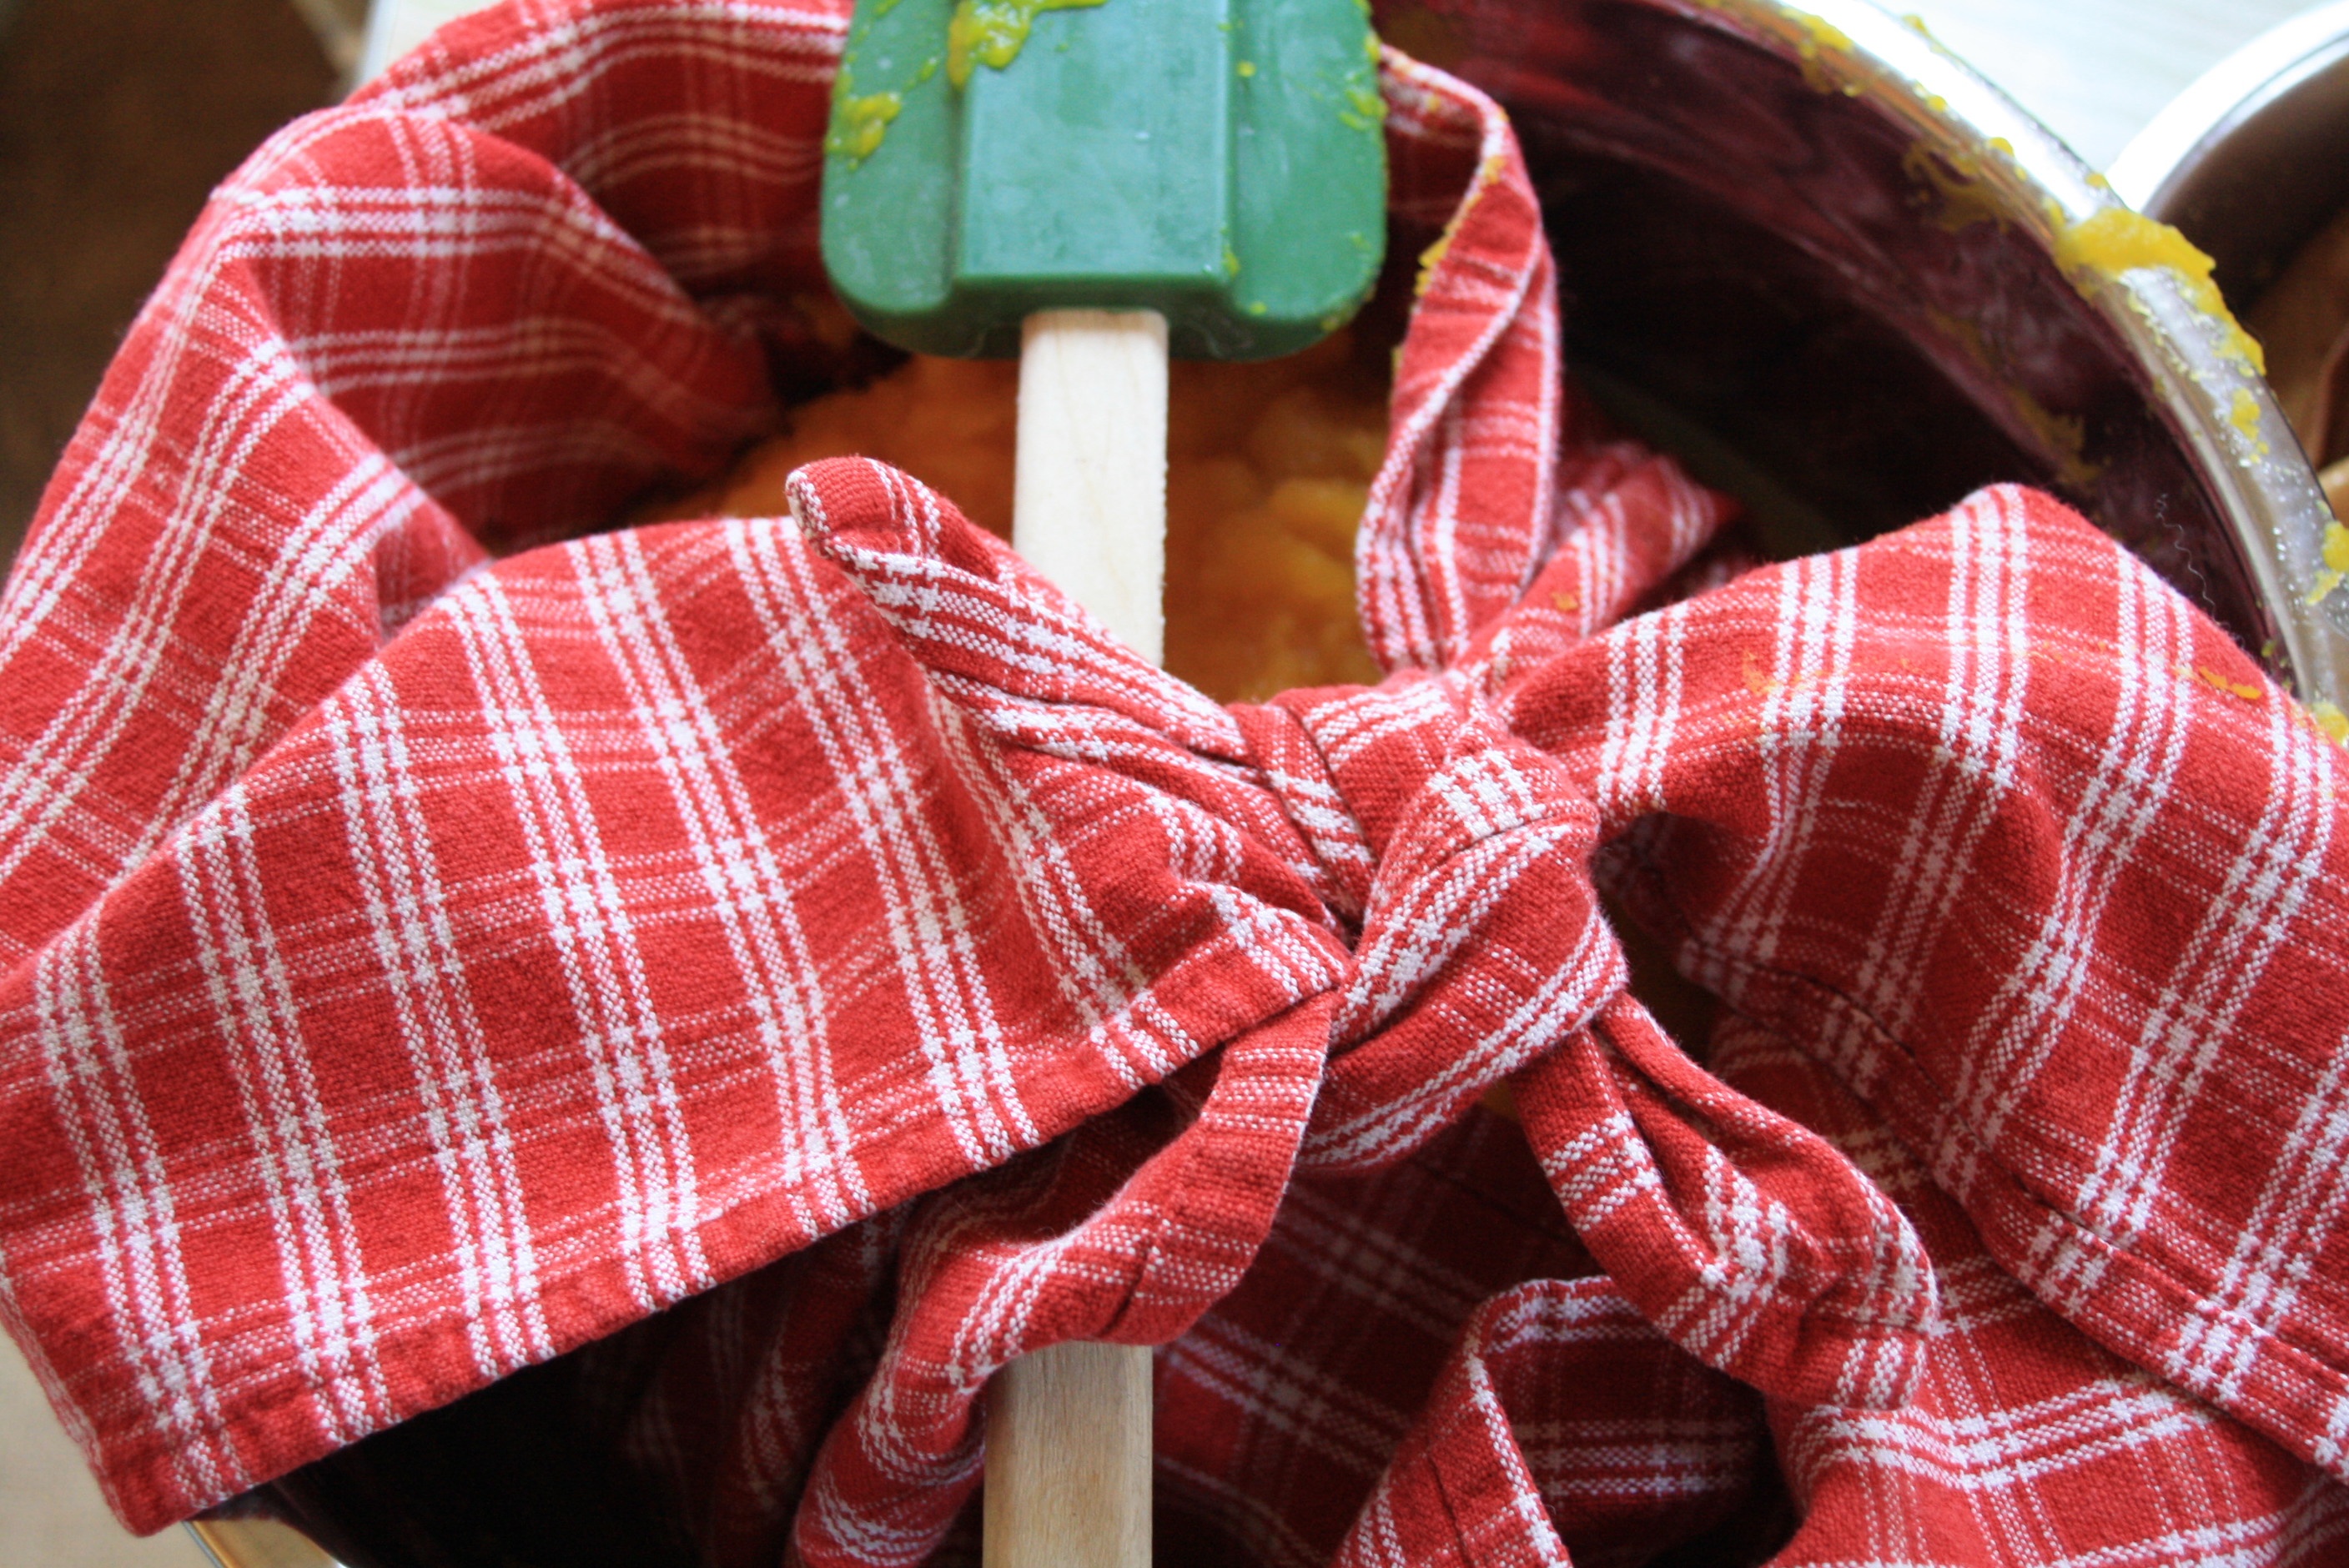 Pull the towel up by the utensil or the corners and let is drain. You might get a little liquid, or a lot. The point is to remove as much water as you can (without going all OCD over it) so you are not dealing with that liquid when it hits your pie. If you put this naturally watery mess in you pie filling it won’t be the end of the world, but it will take FOREVER to bake all that water out. So that means 2-3 hours in the oven. That means a fully burned crust and a very late dessert! Nope, better to just get all that water out now 🙂
 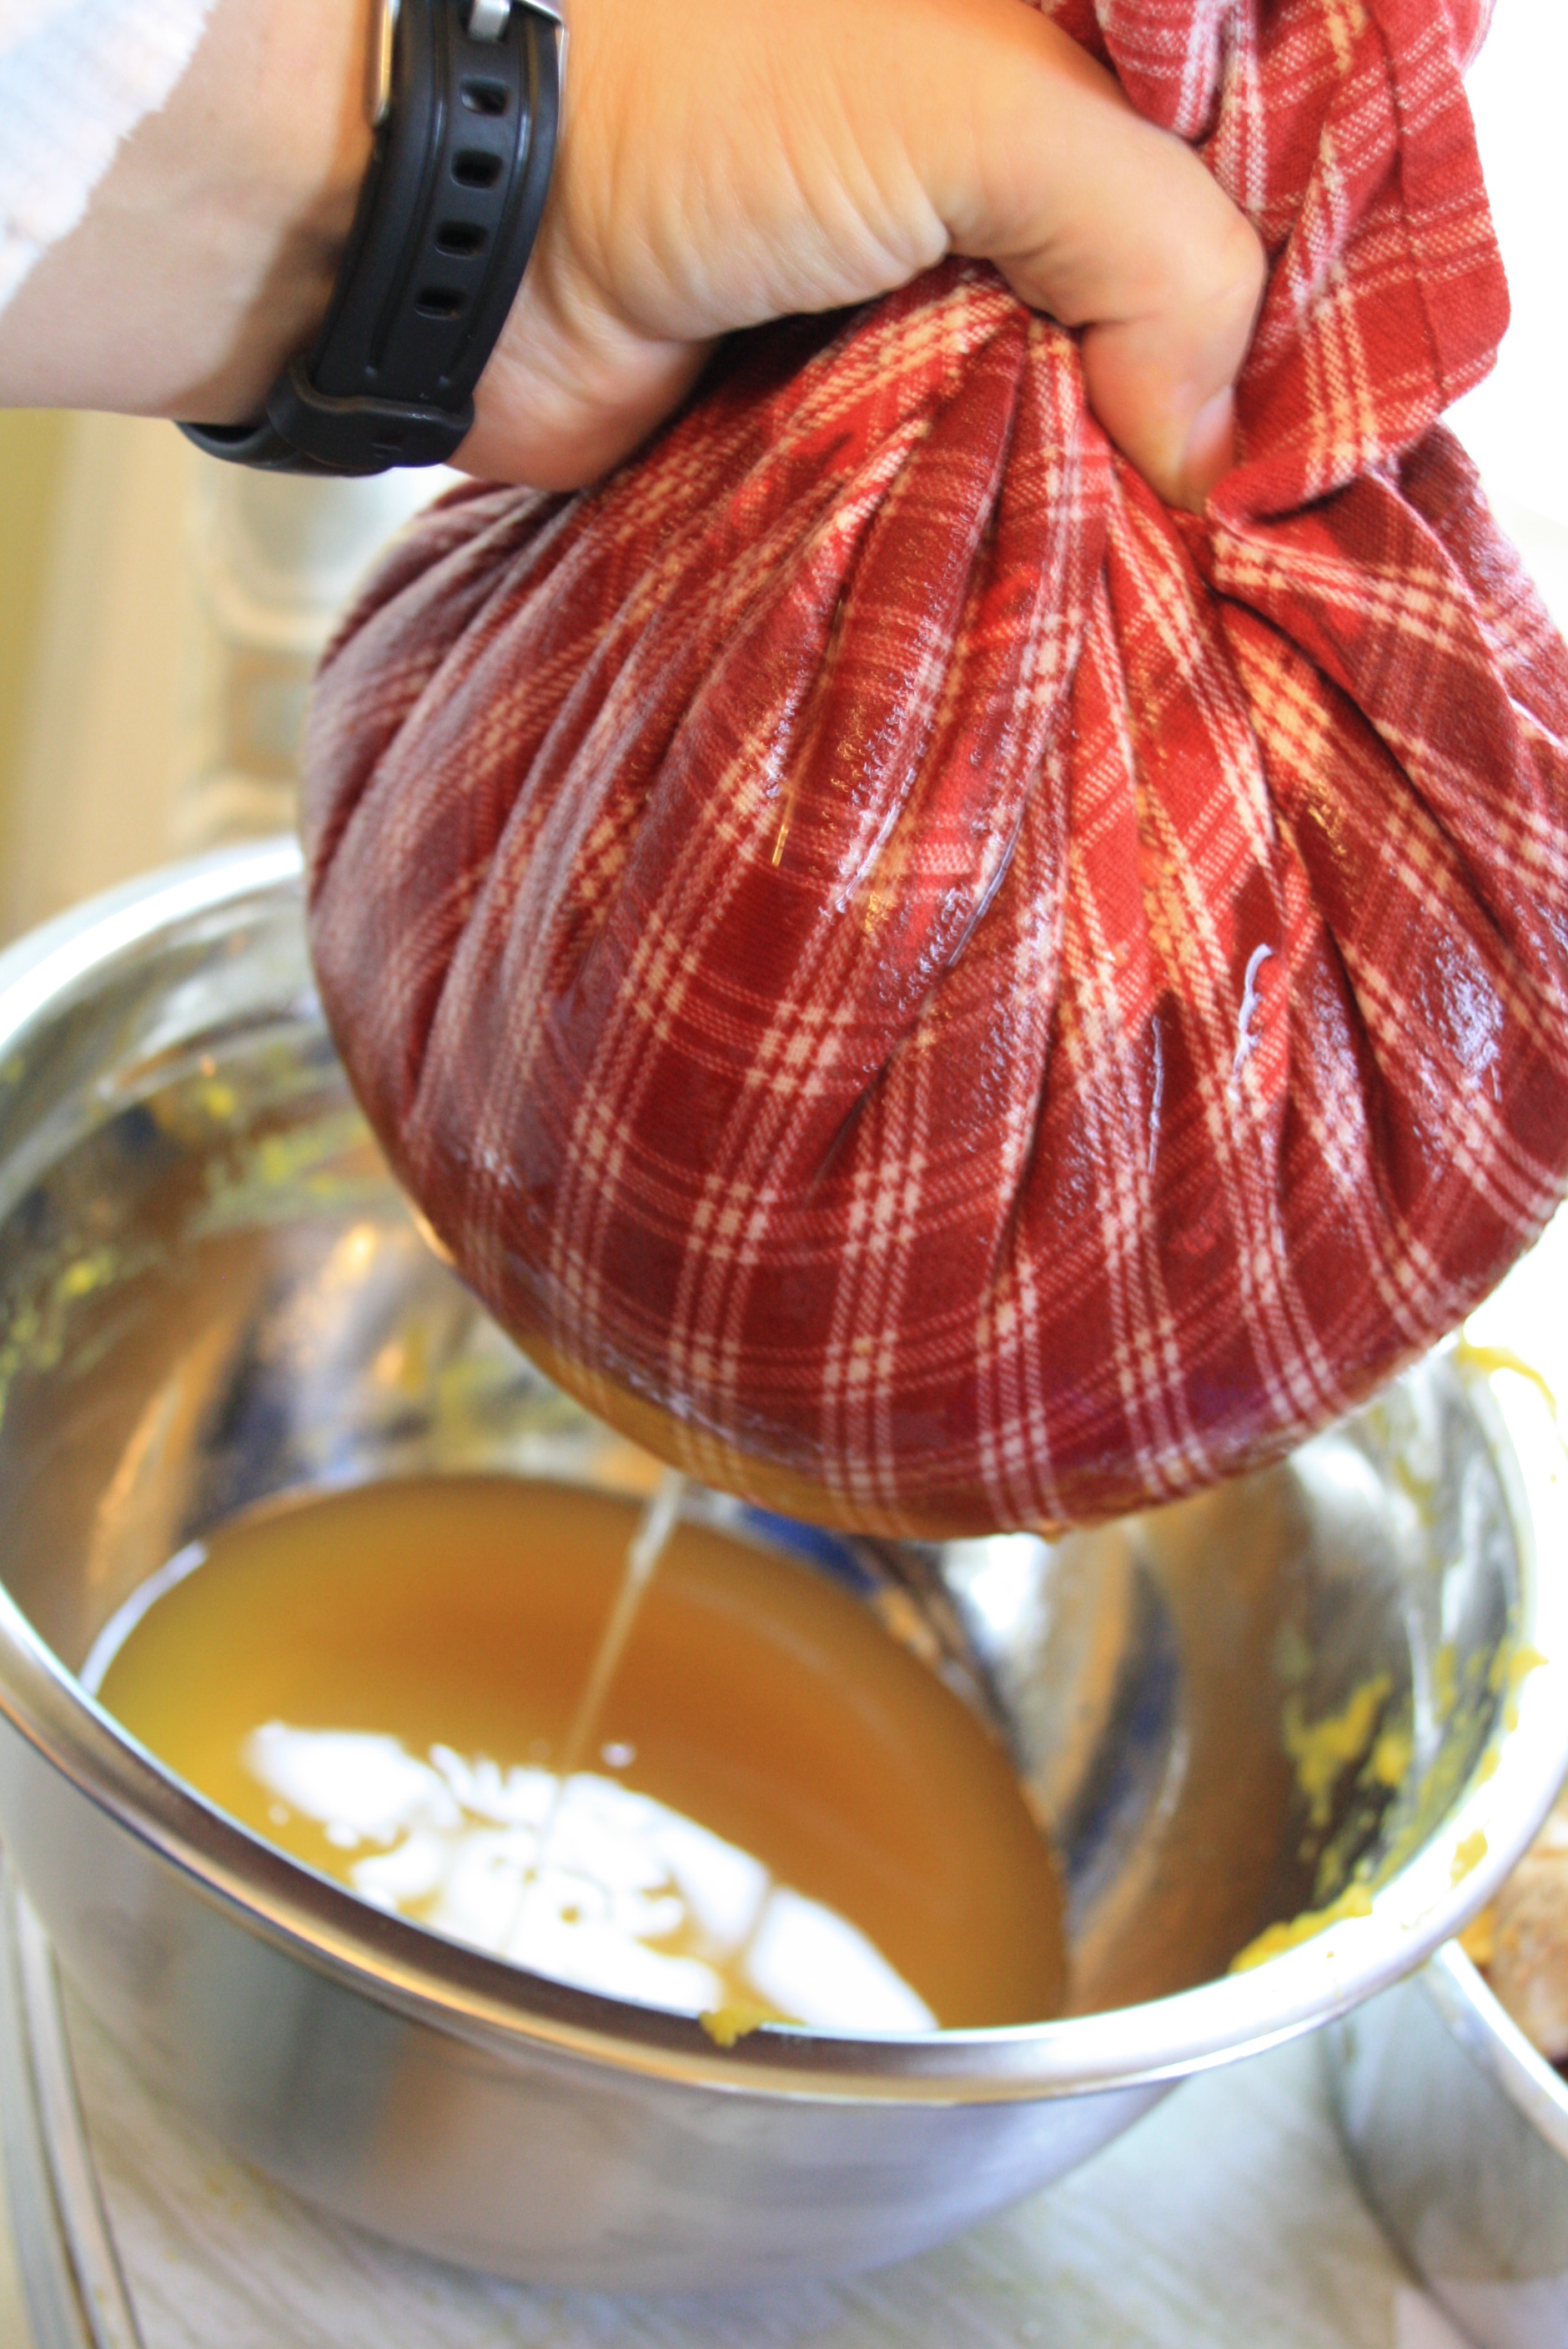 You can let the towel hang over the bowl, in the sink, wherever – or you can kind of squeeze it out by turning the towel around the utensil+knots. Don’t get too aggressive doing this or it will all squish out the top/sides of the towel. I got about six cups all told out of this batch. That was one Sweet Meat, three Sugar Pie, and two medium sized Butternut squashes. That’s more than normal, but not totally unexpected.
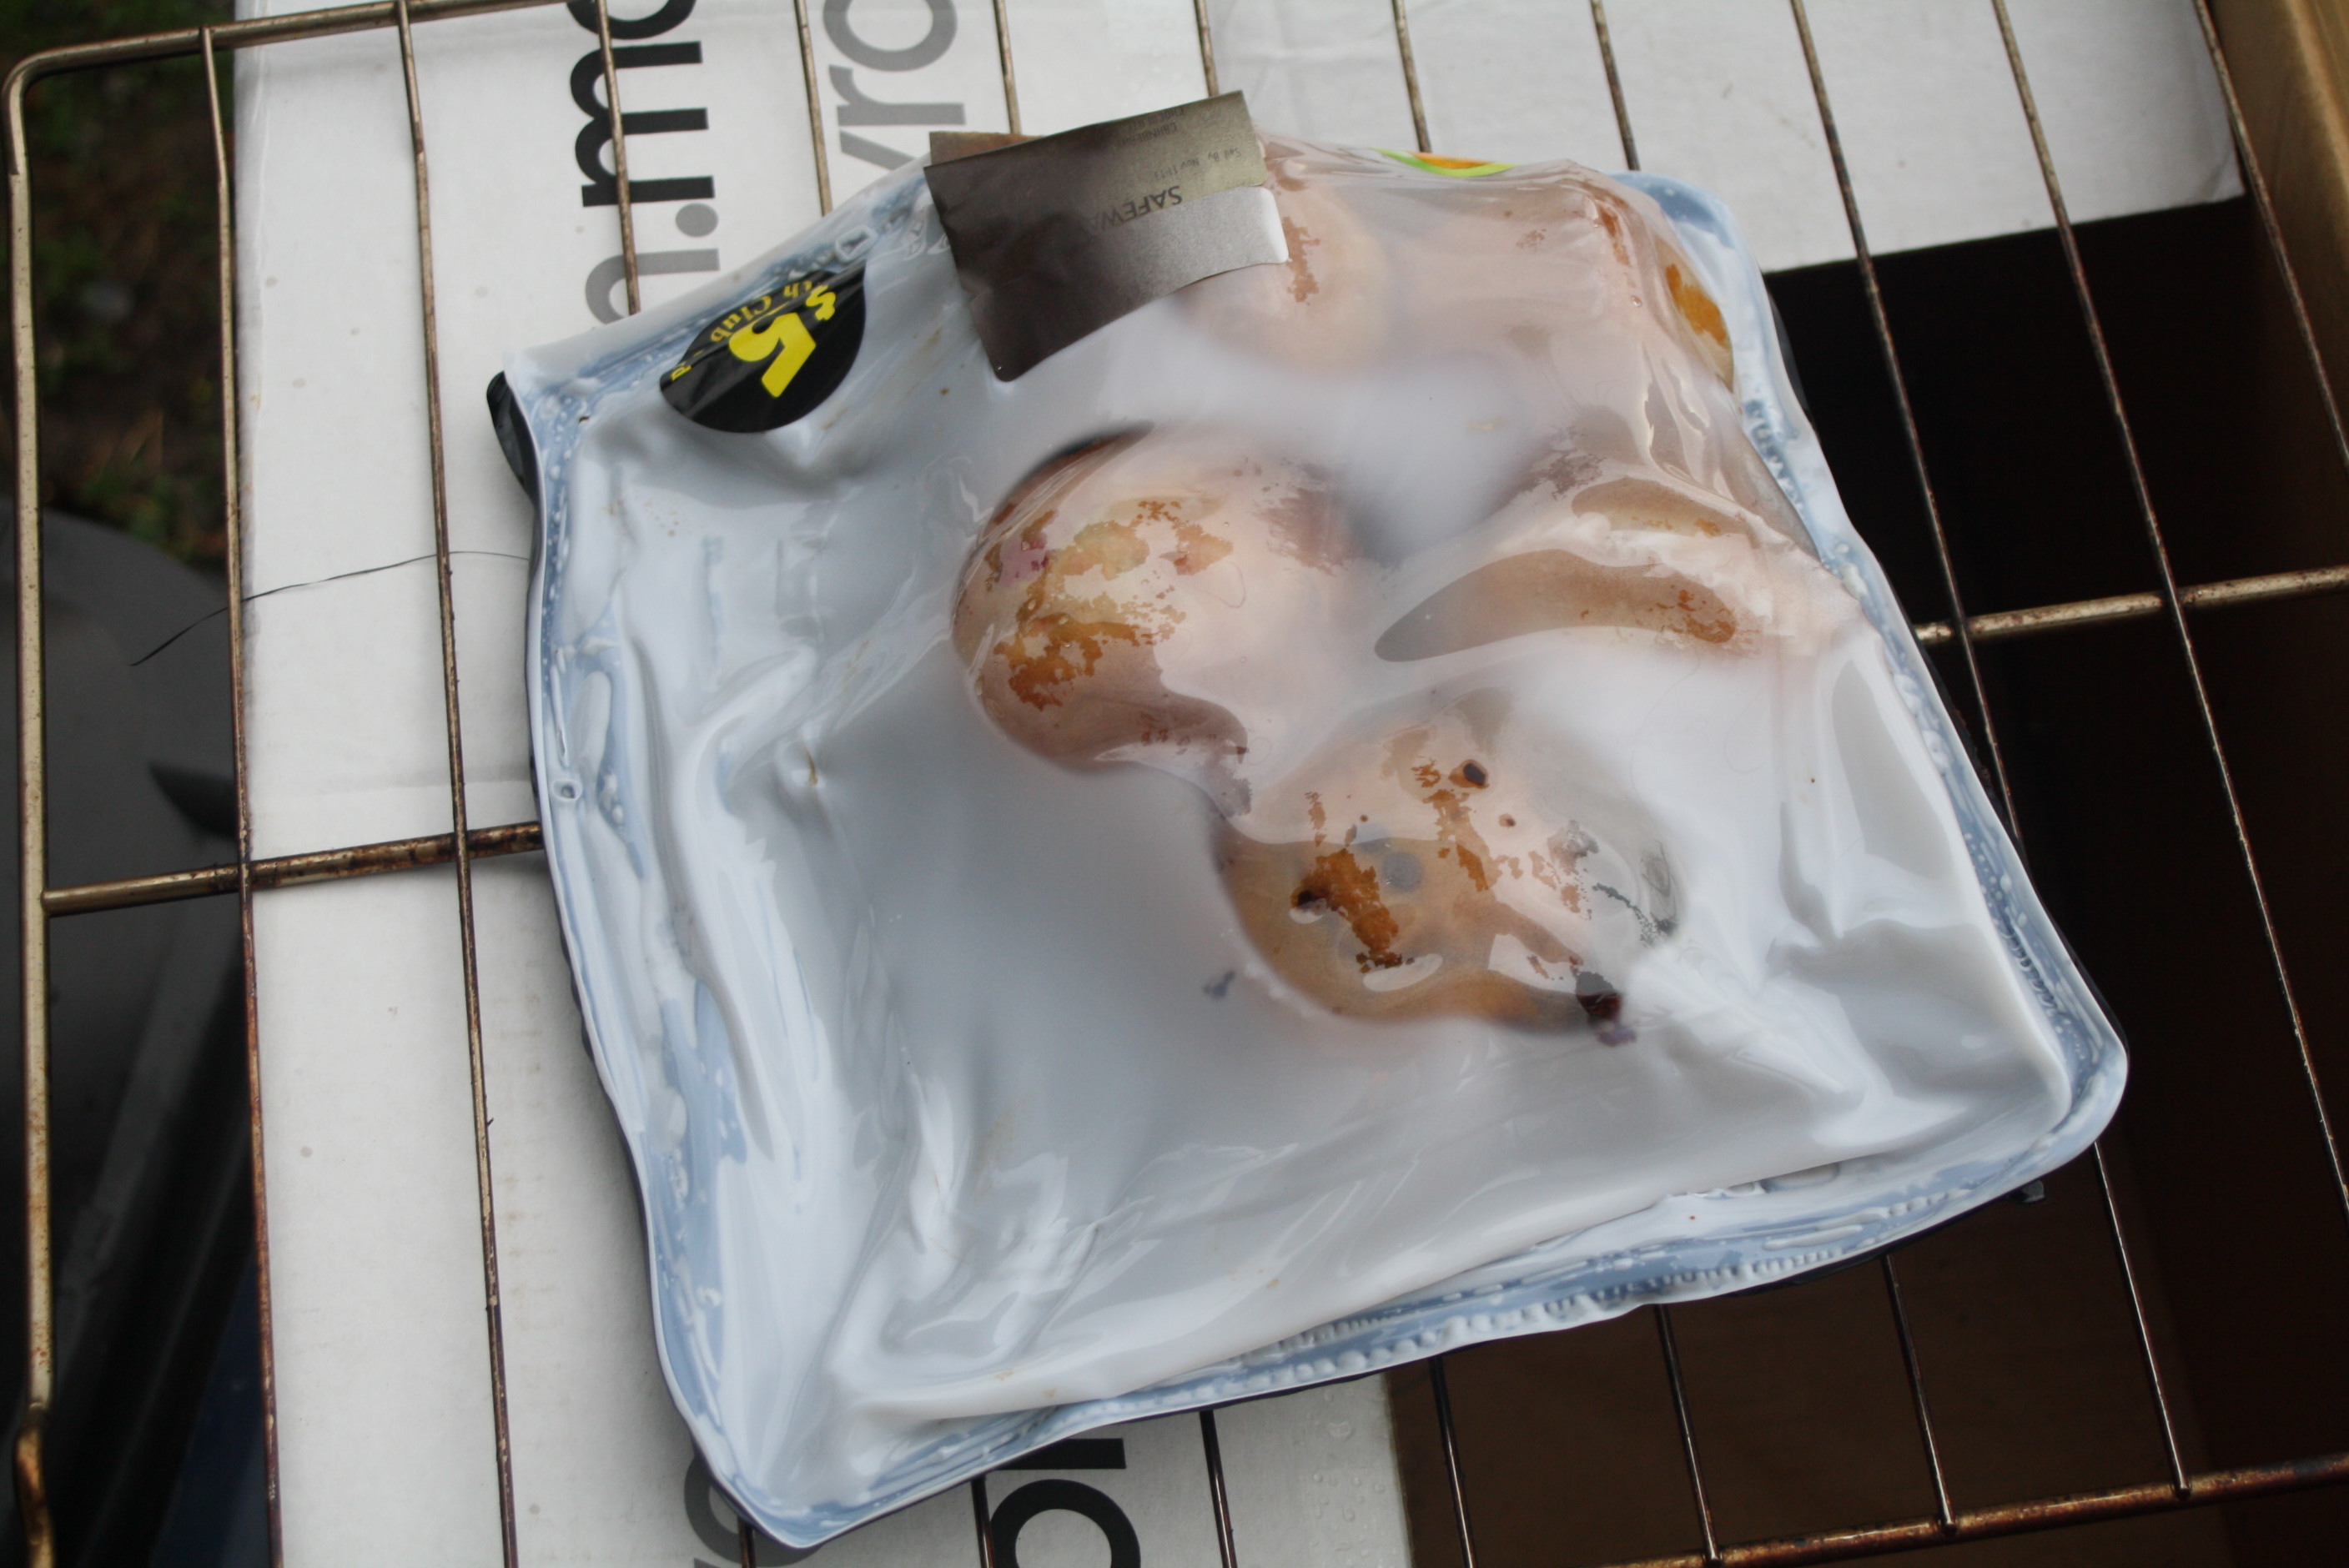
 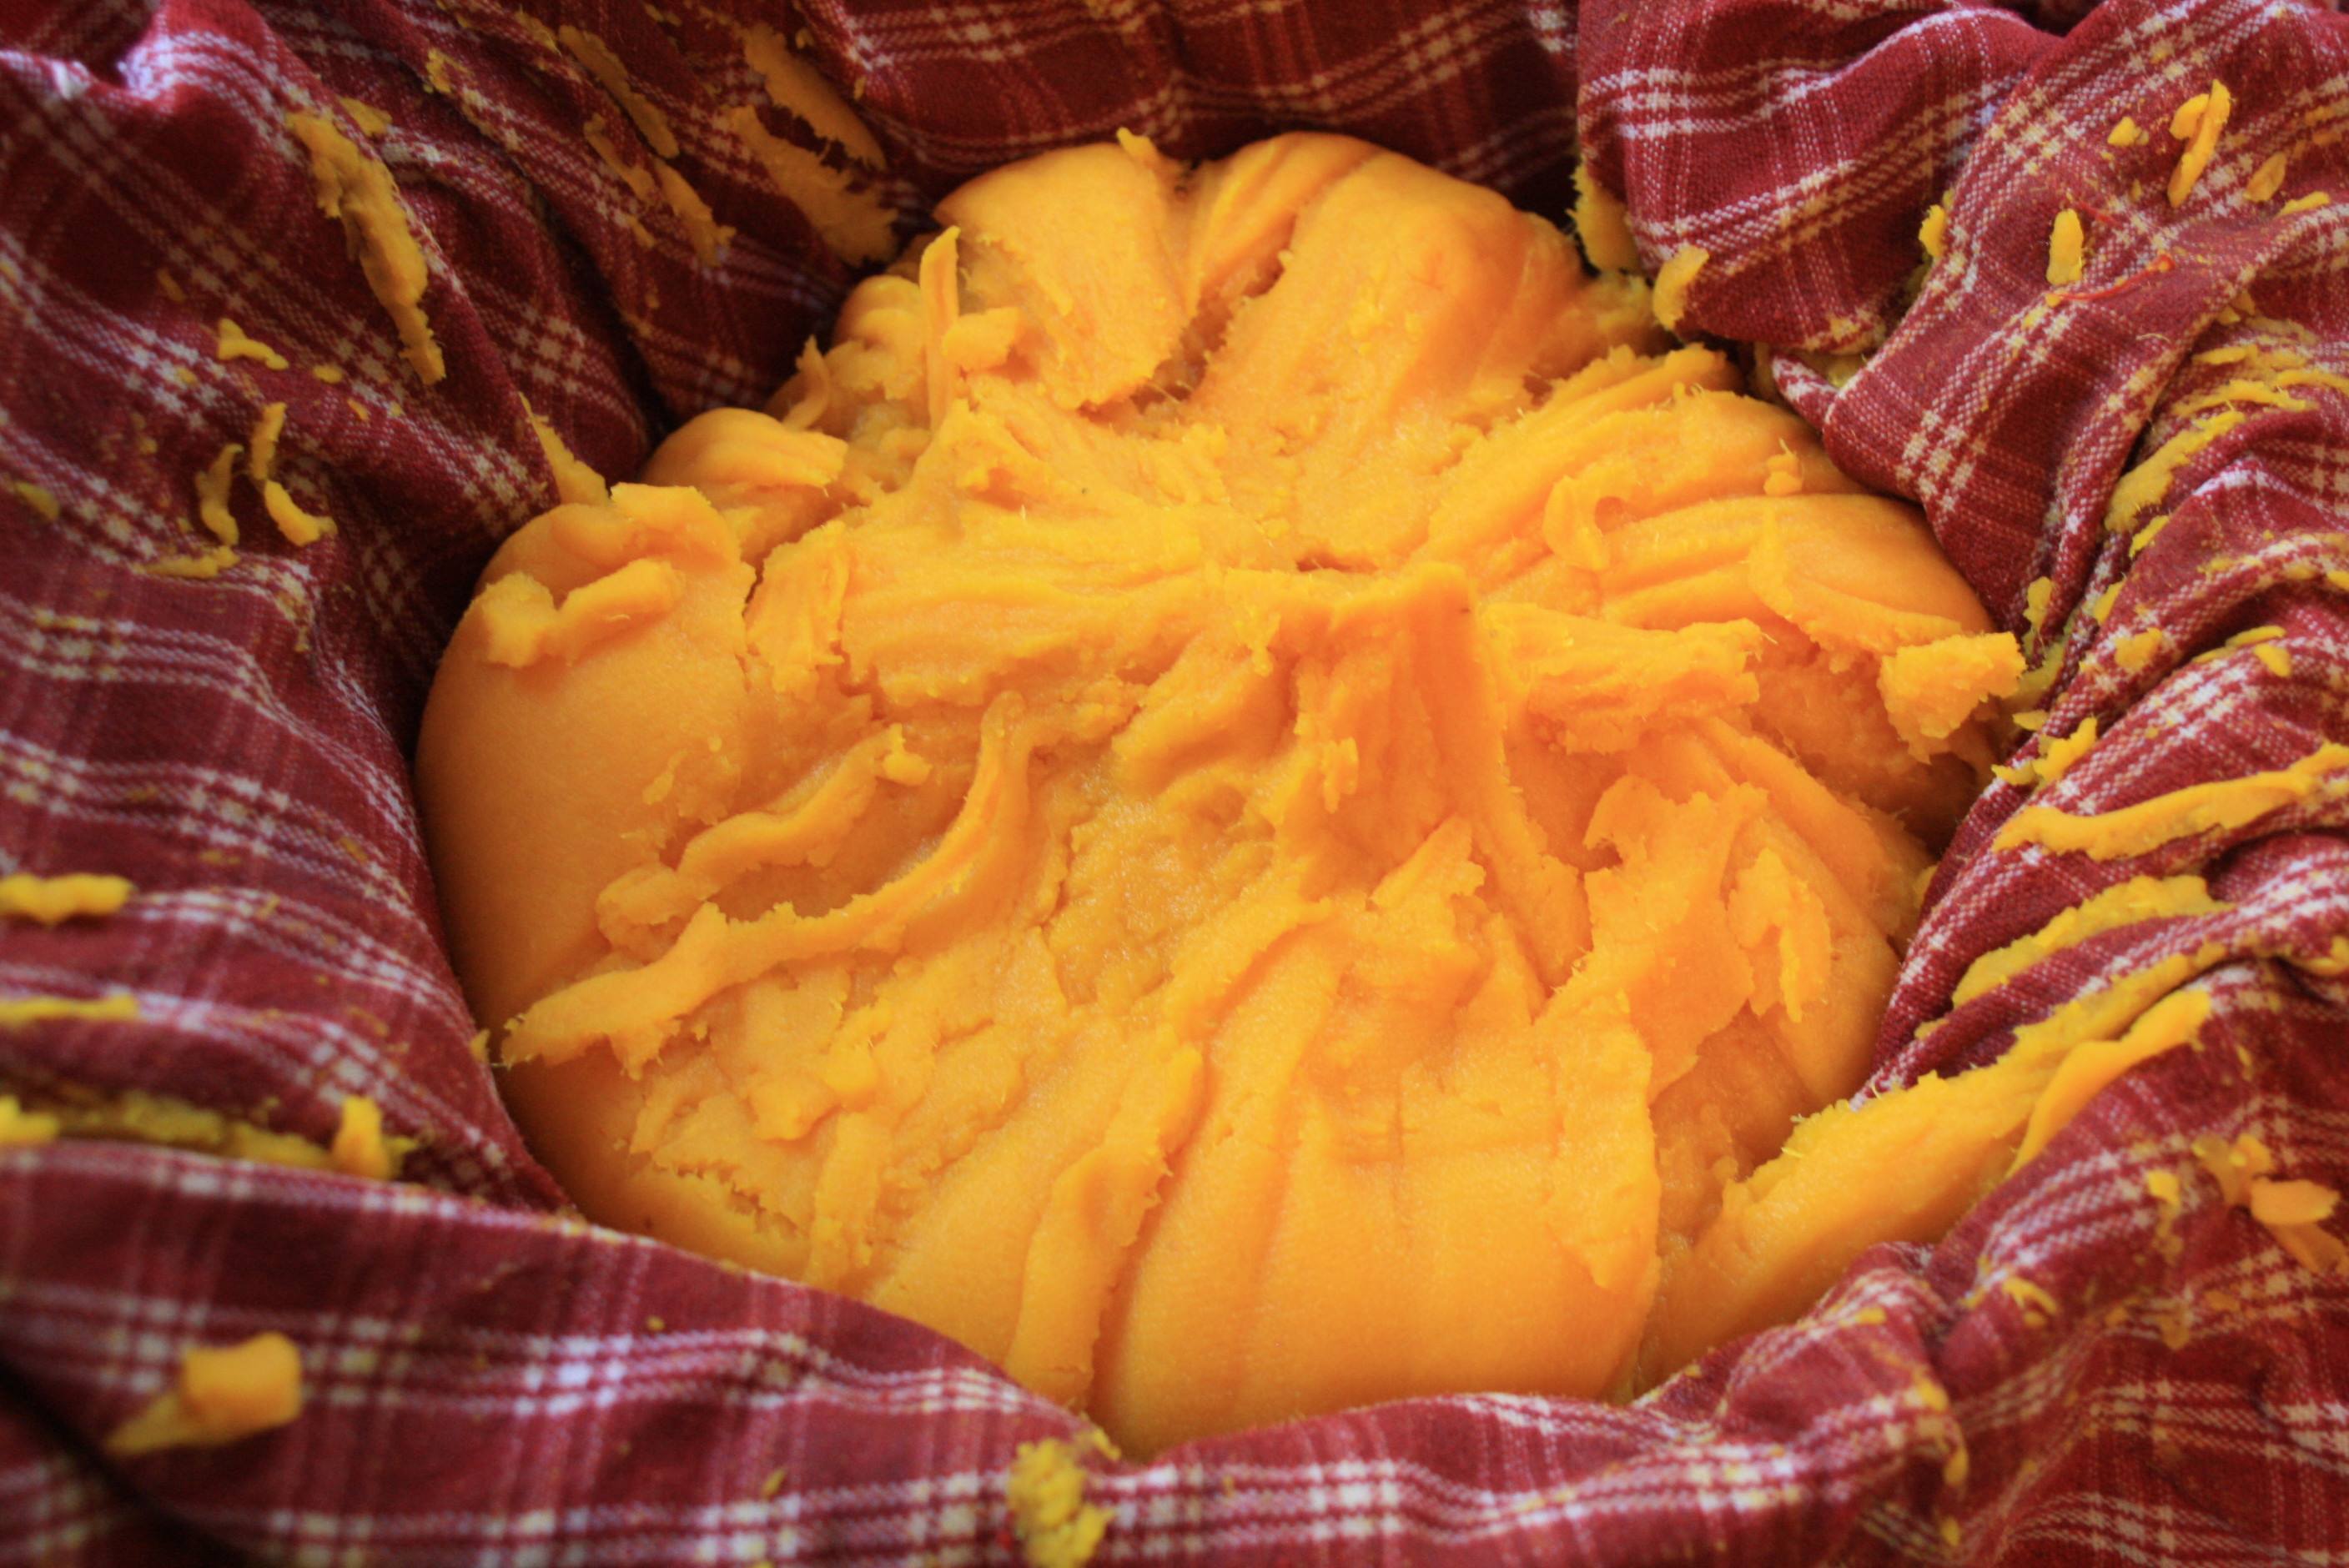 When your squash looks like this, you’re done! Divide it up into 1-2 cup portions and pop it in the freezer for use all winter long.
  Recipe Ideas:

Which one was the one that tasted bad? The warty one or the white one? Great photos and description of process.
LikeLike
The warty one. The grey one is the Sweet Meat 🙂
LikeLike
I’m trying to decide what to do with the three pumpkins that I put out for Halloween. Probably should get busy and cook ’em up.
LikeLike
Today was cook the pumpkins day. Should have read your directions ahead of time. First I cut the pumpkins in quarters so now they won’t lie face down in the pan. And I scooped out the seeds. I want to give the seeds to the birds or squirrels. Should I just bake them in the oven like I did the squashes? Feeling pretty silly!!
LikeLike
You can still bake them. Either sort of piece them back together (cut side down) or baste with some olive oil so they don’t dry out. Either way, I’d suggest s tin foil cover 🙂
LikeLike